There’s a thread on the Raspberry Pi forums from August 2014, still active in 2026, where a user named salka can’t write his 8 GB IMG backup to a brand new 8 GB SD card. Same brand on both. Identical advertised capacity. The Windows machine hasn’t changed. Win32 Disk Imager keeps throwing a “too small” error and refusing to write. Eight years later, that thread still gets bumped, because the same thing keeps happening to people, and the answer is one of those facts about disk images that nobody bothers to explain until it bites you.
I’ve been writing IMG files to USB drives and SD cards on Windows since around 2013, mostly for Raspberry Pi work and the occasional Linux live USB. I run Win32 Disk Imager 1.0.0 (the March 2017 release that’s still the current version on SourceForge in 2026) on a regular Windows 11 23H2 desktop with a SanDisk Extreme Pro card reader. So this isn’t a Wikipedia summary. It’s what the format actually is, why disk images and disc images aren’t quite the same thing, why Win32 Disk Imager makes IMG files so big, and what to do when someone hands you one and asks what to open it with.
TL;DR: An IMG file is a raw, sector-by-sector copy of an entire disk, including the boot sector, partition table, and every byte of every partition. It’s different from an ISO (which is technically optical-disc-only and uses ISO 9660), different from a VHD or VMDK (virtual machine formats), and different from a “disc image” (which usually means optical media). Win32 Disk Imager creates IMG files because it copies sectors, not files. That’s why a 32 GB SD card always produces a 32 GB IMG, even if only 4 GB is in use.
What an IMG File Actually Is (the 30-second answer)
An IMG file is a complete, uncompressed, byte-for-byte copy of a storage device’s contents stored as a single file. Every sector from the source disk gets copied to the IMG in the same order, whether that sector contains the bootloader, a piece of an operating system, your photos, or completely empty space. It’s the same idea as the Unix dd command output, just packaged for Windows users.
The format goes back further than most people realise. The .img extension was originally used for floppy disk raw images in the 1980s, when copy-protected floppies needed exact byte-level reproduction. A standard 1.44 MB floppy IMG is 1,474,560 bytes. That number isn’t arbitrary, it’s computed as cylinders × heads × sectors per track × 512-byte sectors per track. That same math still applies to modern IMG files of SD cards and USB drives, just with much bigger numbers, and it’s a surprisingly direct lineage if you think about it.
If you want a single sentence: an IMG is a photograph of every byte on a disk, taken at one moment, stored in one file. I describe it that way because it’s what finally clicked for me when I first tried to wrap my head around why my 32 GB Pi backup ate 32 GB of laptop storage. I’d flashed dozens of cards before I bothered understanding why.
Disk Image vs Disc Image: Yes, the Spelling Matters (Sort Of)
This trips up a lot of people, especially when they search “windows 10 disc image” or “disc image file” and start getting hits about CDs and DVDs. Here’s the actual distinction, and it’s not as deep as the SEO-spam articles make it sound:
- Disk image (with a k): copies of magnetic or solid-state storage. Hard drives, SSDs, SD cards, USB sticks. IMG, VHD, VMDK, raw, qcow2.
- Disc image (with a c): copies of optical media. CDs, DVDs, Blu-ray. ISO, BIN/CUE, NRG, MDF/MDS, IMG (yes, also IMG, because the spelling rule isn’t strictly enforced).
In practice, I see the two terms used interchangeably and nobody corrects anyone. Microsoft uses “disc image” in Windows 10 for the ISO-mounting feature (“Mount” in File Explorer’s context menu) because that feature was originally for optical media. The terminology stuck even when ISOs became the standard delivery format for OS installers that nobody actually burns to a disc anymore. Honestly? I still type “disc” half the time when I mean “disk”, and I doubt I’m the only one.
If you’re writing a Raspberry Pi OS image to an SD card, you’re doing disk imaging. If you’re mounting a Windows 11 ISO to install from the desktop, that’s disc imaging by name but functionally the same operation. The file formats are similar enough that tools like Win32 Disk Imager will write either one to a USB drive without caring which letter you used in the search.
What’s Inside an IMG File
A 32 GB SD card holding Raspberry Pi OS, when imaged with Win32 Disk Imager, produces an IMG file that’s exactly 32 GB on disk. Inside that file, in order, you’ll find:
- Sector 0 (the first 512 bytes): the Master Boot Record (MBR), or a protective MBR if the card uses GPT.
- Sectors 1-33: if GPT, the GPT header and partition table listing where each partition starts and ends.
- First partition: typically a small FAT32 boot partition (around 256 MB on Pi OS) holding
config.txt,cmdline.txt, the kernel, and bootloader files. - Second partition: the main filesystem, usually ext4 for Linux/Pi or NTFS for Windows. This is where the OS actually lives.
- Empty sectors: all the unused space, written as zeroes (or whatever leftover bytes happened to be in those sectors). This is why IMG files are huge.
The IMG file doesn’t know which sectors contain “real” data and which are empty. From its perspective, every sector is just bytes. That’s a feature, not a bug. It’s what lets you boot from the IMG when you write it back. The boot sector has to be at sector 0 exactly, the partition table at the right offsets, the kernel at the path the bootloader expects. Move any of that and the disk doesn’t boot. I learned this the hard way back in 2018 when I tried to copy a Pi card by dragging files in File Explorer and was surprised the new card wouldn’t boot.
This is also why you can’t fit a 32 GB IMG onto a 16 GB card. The file format doesn’t distinguish data from emptiness, so the file is as big as the source drive even if the actual content is tiny.
IMG vs ISO vs BIN vs VHD vs DMG: The Comparison Table
People conflate these constantly. I get asked at least once a month why someone “can’t open the ISO” their friend sent them, and it turns out the friend sent a VHD file with the wrong extension. So here’s my map of disk image formats you’ll run into in 2026, based on actually using each one.
| Format | Origin / Use | Compressed? | Bootable? | Windows native support |
|---|---|---|---|---|
| IMG | Floppy disks, then SD/USB/HDD raw images | No (uncompressed) | Yes (if source had bootloader) | No (needs Win32DI, Rufus, Etcher) |
| ISO | Optical discs (ISO 9660 filesystem) | No | Usually (OS installers) | Yes (mount via File Explorer since Win 8) |
| BIN/CUE | CD audio + retro game rips | No | No (not directly) | No (third-party only) |
| VHD / VHDX | Microsoft Hyper-V virtual disks | Optional (sparse) | Yes (Windows-To-Go) | Yes (mount via Disk Management) |
| VMDK | VMware virtual machines | Optional | Yes (in VM) | No (VMware Workstation needed) |
| QCOW2 | QEMU/KVM Linux virtualisation | Yes (copy-on-write) | Yes (in VM) | No (qemu-img needed) |
| DMG | Apple disk images | Yes (with encryption option) | Yes (on macOS) | No (third-party tools) |
| IMZ / IMA | Compressed/uncompressed floppy by WinImage | IMZ yes (gzip), IMA no | Yes (floppies) | No |
The MIME type for IMG, by the way, is application/vnd.efi.img, which tells you something about its modern usage: lots of UEFI firmware updates ship as IMG files because the format’s filesystem-agnostic and writes to any block device cleanly. That’s why you’ll see motherboard BIOS updates and embedded device firmware shipped as .img in 2026.
For practical Win32 Disk Imager use, I’m dealing with two formats almost exclusively: IMG (Raspberry Pi OS, Linux ARM distros, custom embedded firmware) and ISO (Linux desktop installers and the occasional bootable diagnostic tool). Everything else is a different ecosystem and you don’t really need to worry about it.
How Win32 Disk Imager Creates IMG Files (Sector by Sector)
Win32 Disk Imager is fundamentally a Windows port of the dd command-line copier. The whole program’s a couple hundred lines of C++ wrapped around CreateFile and ReadFile/WriteFile API calls, opening the raw block device (using the \\.\ physical path syntax) and reading bytes off the disk in 1 MB chunks until it hits the end. That’s it. There’s no magic.
The program doesn’t understand filesystems. It doesn’t know the difference between an ext4 partition full of system files and a region of unallocated empty sectors. It just copies bytes from offset 0 to offset N where N is the disk capacity, and writes them in order to the IMG file. That’s why the output is always exactly the size of the source drive.
This filesystem-blind behavior is what makes Win32 Disk Imager useful for embedded work. I’ve used it on ext4, NTFS, FAT32, exFAT, Apple HFS+ (yes, even those), and on cards with no filesystem at all that were just raw firmware blobs. It doesn’t care. The downside is the size, which I’ll get to in a second.
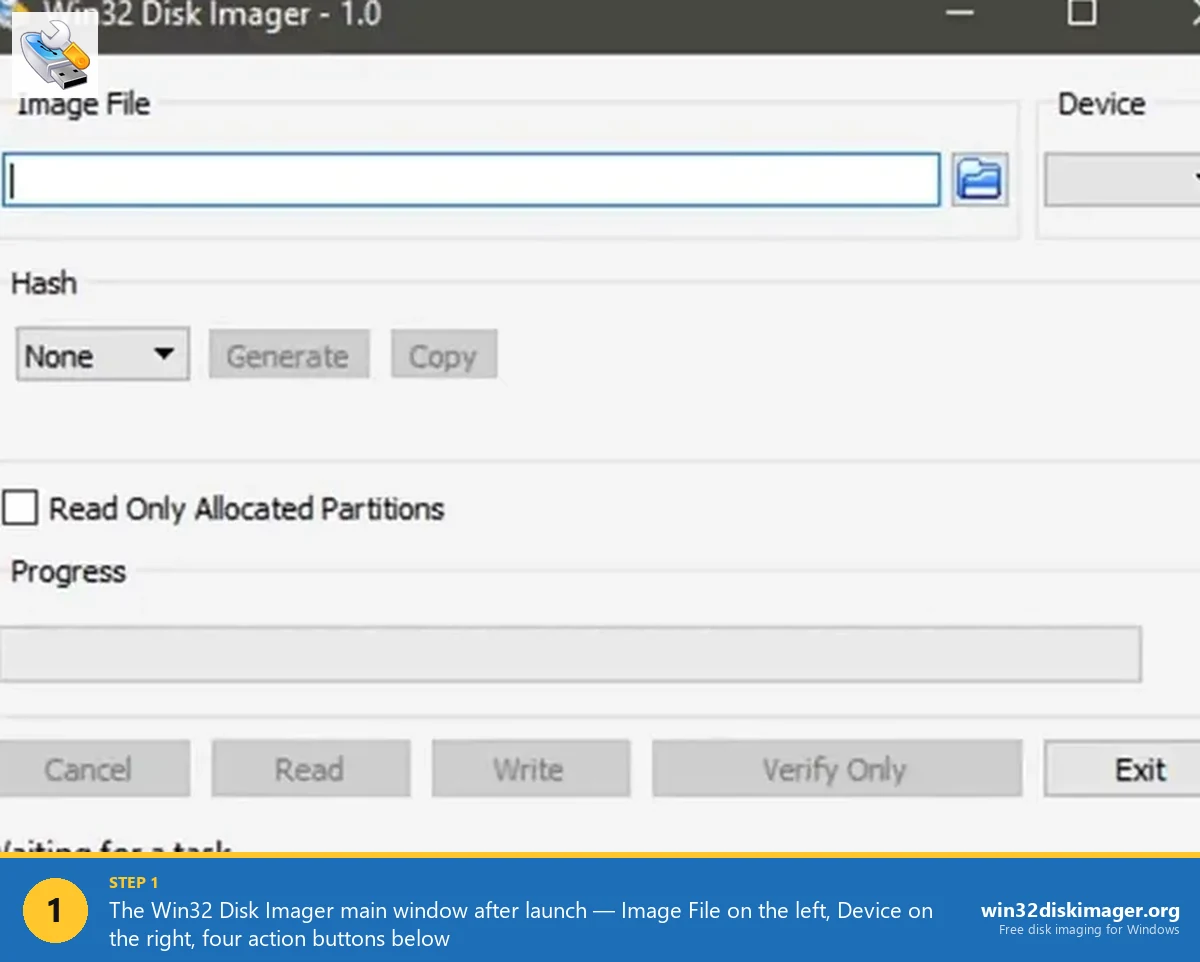
One useful Win32 Disk Imager 1.0.0 feature most people overlook: the “Read Only Allocated Partitions” checkbox, added in the v1.0 release in March 2017. When checked, it stops reading once it hits the last allocated partition, instead of continuing through the trailing empty space to the end of the device. That shrinks the IMG noticeably on cards with smaller partitions than total capacity. It’s still sector-by-sector inside the partitions, so the IMG’s exactly as big as the partitions plus their free space, which is usually still a lot. Don’t expect miracles, but it’s worth ticking.
Why Win32 Disk Imager IMG Files Are So Big (And How to Shrink Them)
It’s the question I see most often, in some variation: “Why’s my backup of a 32 GB SD card 32 GB on disk when I’ve only got 4 GB of stuff on it?” I asked it myself the first time I imaged a Pi card.
Because IMG is sector-by-sector, every sector gets written. Empty sectors aren’t compressed, aren’t skipped, aren’t tagged as empty. They just get written as 512 bytes of zeroes (or whatever was there before the partition was wiped). A 32 GB IMG of a half-empty 32 GB card is 32 GB.
I’ve watched this bite people three specific ways:
- Storage cost: backing up six Pi setups eats 192 GB even if each Pi is barely using 8 GB.
- The “won’t fit on the same-size card” problem: back to salka’s 2014 forum post. SD cards labelled identically can vary by 50-300 MB, so an 8 GB IMG might be too big for a different 8 GB card.
- Transfer time: uploading a 32 GB IMG to backup storage takes way longer than it needs to.
The capacity-variance issue is real and has been documented. Forum moderator AndrewS on the Raspberry Pi forums tested several “8 GB” cards from different brands and found capacities ranging from 7,384 MB to 7,695 MB. Kingston confirmed in a support response that “results may vary from one card or batch to the next, depending on the type of components used during the manufacturing process.” So if your IMG was made from a card on the high end of that range, it physically can’t fit on one from the low end. That’s not your fault, it’s not Win32 Disk Imager’s fault, and there’s nothing the program can do about it.
There are three reasonable workarounds:
- Compression after the fact. An IMG is mostly zeroes if the card was mostly empty, so it compresses extremely well. Run
7z a -mx9 backup.img.7z backup.imgand a 32 GB IMG with 4 GB of real data drops to roughly 4-5 GB. Free, works on Windows. - PiShrink (Linux-only). The PiShrink script (drewsif/PiShrink on GitHub, MIT license) shrinks a Pi IMG by reading the ext4 partition’s actual used size and resizing the partition + IMG to match. Output is a small IMG that auto-expands on first boot. Needs WSL or a Linux box. Hugely popular: 5,400+ stars on GitHub as of April 2026.
- Read Only Allocated Partitions checkbox. Win32 Disk Imager’s own partial fix. Smaller IMG, but still significantly larger than the actual data.
I’ve used all three. PiShrink is by far the cleanest if you have access to Linux/WSL. For pure-Windows workflows, 7-Zip after the fact is good enough.
Disk Imaging vs Disk Cloning: They’re Not the Same Workflow
I see “disk clone” and “disk image” used interchangeably online and even on tool sales pages, and they’re related but not identical operations. The distinction matters when you’re picking software, because some tools only do one of the two.
- Disk imaging: source disk → IMG file. The output is a file you can store, copy, or restore later. Win32 Disk Imager is an imaging tool.
- Disk cloning: source disk → destination disk, directly. No intermediate file. The destination becomes a working copy of the source as fast as the slower drive can be written. Clonezilla and Macrium Reflect (when its Free version still existed) are cloning tools.
You can simulate cloning with imaging by reading the source to an IMG and immediately writing the IMG to the destination, but that’s two operations and twice the wait. I’ll do this for SD cards because I’d want the IMG file as a backup anyway, but for HDD-to-HDD work, a real cloning tool reads from one device and writes to another in parallel and skips the file entirely.
Win32 Disk Imager doesn’t do cloning. If you want to clone a hard drive on Windows in 2026, that’s a different toolchain. I cover this in detail in the Win32 Disk Imager vs Clonezilla comparison, but the short version is: use Clonezilla for HDD-to-HDD cloning, Win32 Disk Imager for SD card and USB-to-IMG-to-SD card workflows.
Free Disk Imaging Software in 2026 (What I Actually Use)
The free disk imaging tool everyone used to recommend, Macrium Reflect Free, got retired by its developer on January 1, 2024. As of 2026, the previously dominant free option isn’t maintained anymore. Existing users can keep running their last installed version, but there’s no security patches, no new OS support, and no Windows 11 24H2-specific fixes.
Here’s what’s free and actually works in 2026:
| Tool | License | Best for | Windows 11 24H2 |
|---|---|---|---|
| Win32 Disk Imager | GPLv2 | SD card / USB IMG read+write | Yes (with admin rights) |
| balenaEtcher | Apache 2.0 | Cross-platform IMG/ISO flashing | Yes |
| Rufus | GPLv3 | Bootable Windows USB installers | Yes |
| Clonezilla Live | GPL | Disk-to-disk cloning, full HDD imaging | Yes (booted from USB) |
| Rescuezilla | GPLv3 | Macrium Free replacement, GUI version of Clonezilla | Yes |
| Hasleo Backup Suite Free | Freeware | Scheduled Windows backup imaging | Yes |
| AOMEI Backupper Standard | Freeware | Disk imaging + cloning, Windows-focused | Yes |
| EaseUS Todo Backup Free | Freeware (limited) | Beginner-friendly imaging | Yes |
For what it’s worth, I’ve watched the post-Macrium void mostly get filled by Hasleo Backup Suite Free and AOMEI Backupper for Windows-system imaging, and by Rescuezilla for boot-from-USB rescue scenarios. None of them is a perfect drop-in replacement. Hasleo gets closest in my experience if you want the same scheduled-image-then-restore workflow Macrium gave you.
Win32 Disk Imager doesn’t compete with any of these for full-PC backup. It does one job well (sector-level read/write of removable media) and stays out of the rest.
How to Create an IMG File on Windows (with Win32 Disk Imager)
I’ve gone through this process probably 200 times in the last decade. It’s six clicks once you’ve done it once, but the first time around there are a couple of gotchas I wish someone had told me:
- Plug in the source drive (the SD card or USB you want to image). Wait for Windows to see it. If File Explorer doesn’t show the drive letter, that’s fine, Win32 Disk Imager doesn’t need a mounted filesystem to read.
- Right-click Win32 Disk Imager and “Run as administrator”. Without admin rights you’ll get the famous Error 5: Access Denied that I covered separately in the Error 5 fixes guide.
- Pick the device drive letter from the dropdown on the right. Triple-check this. The program reads from whatever drive you select, and if you pick your main C: by mistake, you’ll be making a system-disk IMG (which usually fails with another error, but still).
- Click the folder icon next to the Image File box and pick where to save the IMG. Pick a location with enough free space, the IMG is going to be the size of the source drive.
- Optional: tick “Read Only Allocated Partitions” if you want a smaller (but still large) IMG. Skip this if you need an exact byte-for-byte forensic copy.
- Click Read to start. The progress bar advances based on raw bytes read, so a 32 GB card on a USB 3.0 reader takes about 6-8 minutes. A USB 2.0 reader can take 30+ minutes for the same card. Slow readers are the bottleneck here, not Win32 Disk Imager.
When it finishes, you’ll have a file that ends in .img. You can copy it, archive it, ship it to someone, write it to another card later. It’s just a file from this point.
How to Open and Read an IMG File on Windows
Windows doesn’t natively mount IMG files the way it does ISOs. Double-clicking an IMG just opens the “How do you want to open this file?” dialog. I find this annoying every time, but there’re decent workarounds you can install in five minutes.
- To browse files inside an IMG: use OSFMount (free, PassMark Software). It mounts the IMG’s partitions as drive letters, so you can copy individual files out without writing the whole IMG to a card. Works for FAT32 and NTFS partitions natively, ext4 needs a separate driver like ext2fsd or DiskInternals Linux Reader.
- To extract a single file from a Pi OS IMG: 7-Zip (since version 19 or so) can open IMG files and let you browse the partition tree. Right-click the IMG, “Open Archive”, and you’ll see partition0, partition1, and so on. This works for the FAT boot partition, but ext4 partitions show as opaque blobs.
- To write an IMG back to a card: Win32 Disk Imager (the obvious one), Rufus, balenaEtcher, or Raspberry Pi Imager. Any of these works.
- To convert IMG to ISO: usually you don’t need to. Most modern tools accept either. If a tool genuinely demands ISO, AnyToISO and PowerISO can do the conversion, though for a raw IMG (not an optical disc image) the conversion is just a rename and may not produce a bootable ISO.
How to Verify an IMG File (MD5, SHA256, BLAKE3)
If you’ve downloaded an IMG from somewhere (Raspberry Pi OS, OctoPrint, RetroPie, Home Assistant), the project will publish a checksum, usually SHA256 these days, sometimes still SHA1 or MD5 for legacy reasons. I verify before flashing every single time, because once a corrupt IMG cost me about three hours of “why won’t this Pi boot” debugging.
The simplest Windows method is PowerShell:
Get-FileHash -Algorithm SHA256 .\2026-01-28-raspios-bookworm-arm64.img.xzThat gives you the SHA256 hex string. Compare it to what the official project published. If it matches, the IMG is byte-identical to what was released. If it doesn’t match, the IMG was either corrupted in transit (re-download) or tampered with (don’t flash it). I covered the full checksum-verification workflow with all three algorithms in the SHA256 hash verification guide.
Win32 Disk Imager 1.0.0 also added a built-in “Verify Image” button that re-reads the destination drive after writing and compares it sector-by-sector to the source IMG. It’s slow (essentially a second read of the entire card) but it’s the most thorough way to confirm the write was clean. If the verify fails, you’ve got a bad card or a flaky reader.
When Do You Need an IMG vs Other Formats?
I think this decision is more practical than people make it. The right format depends on what you’re going to do next, full stop.
- Flashing Raspberry Pi OS, RetroPie, OctoPrint, Home Assistant: IMG. Always. The official downloads ship as
.img.xzcompressed archives. - Installing Linux desktop on a laptop: ISO. Ubuntu, Fedora, Mint, etc. all use hybrid ISOs that work as both optical and USB images.
- Installing Windows 11: ISO from Microsoft, written with Rufus or Microsoft’s Media Creation Tool. Win32 Disk Imager will write the ISO byte-for-byte but the result usually doesn’t UEFI-boot cleanly because Windows installers expect a specific partition layout that raw imaging doesn’t preserve.
- Backing up a working Pi SD card: IMG via Win32 Disk Imager, then PiShrink or 7-Zip compression for storage.
- Cloning a Windows desktop boot drive: not IMG. Use Macrium Reflect (paid in 2026), Hasleo Backup Suite Free, or Clonezilla. Drive-to-drive, not file-based.
- Sharing a custom firmware blob with a hardware project: IMG. It’s the universal raw format embedded developers expect.
A Brief History of Disk Imaging (Why It Started)
The concept goes further back than personal computers. Disk imaging started in the late 1960s on IBM mainframes, where engineers needed to back up disk packs (those refrigerator-sized removable disks holding 5 to 330 megabytes). It’s older than most of us. The original disk image was magnetic tape that mirrored the disk’s bytes in order, so a damaged disk pack could be rebuilt from tape.
The format crossed over to personal computing in the floppy era. Copy-protected floppies needed exact byte-level reproduction (because the protection often relied on weird sector layouts that file-level copying would miss), and tools like CopyIIPC and Disk Image Pro emerged for DOS in the late 1980s. That’s where the .img extension we’re all using in 2026 comes from.
Apple shipped the first widely-used GUI disk imaging tool, Disk Copy, on Mac OS in 1990. Microsoft didn’t ship a built-in disk imaging tool for consumers until Windows 7 (the “Create a system image” feature), and even then it wasn’t using IMG, it used VHD instead.
The Raspberry Pi is what made IMG mainstream for general users in the 2010s. Win32 Disk Imager itself was created originally to flash Pi OS images, and the Pi project’s choice to ship IMG (and later .img.xz) cemented it as the standard for embedded Linux distribution. Today every Pi-style single-board computer (Banana Pi, Orange Pi, Beaglebone, NanoPi, Khadas) ships its OS as IMG, and that’s not changing anytime soon.
It’s a 60-year-old format, basically unchanged in concept, still the most reliable way I know to copy a disk verbatim. That’s the kind of staying power that comes from doing one thing well.
FAQ
Is an IMG file the same as an ISO file?
No, but they’re closer than people think. An ISO is technically a disc image conforming to the ISO 9660 filesystem standard for optical media, with single-track layout. An IMG is a raw byte-for-byte copy of any block device, including non-optical media like SD cards. Many tools (Win32 Disk Imager, Rufus, Etcher) will accept either format and write it to a USB drive without caring about the difference. For Linux desktop distros that ship hybrid ISOs, you can rename .iso to .img and it’ll usually work.
Why is my Win32 Disk Imager backup the same size as the SD card instead of the size of my data?
Because Win32 Disk Imager copies sector-by-sector, not file-by-file. Empty space gets copied along with everything else. A 32 GB SD card always produces a 32 GB IMG regardless of how much actual data’s on it. Tick “Read Only Allocated Partitions” to skip trailing empty space, or run PiShrink afterwards if you’re on Linux/WSL, or just compress the IMG with 7-Zip (mostly-zeroes IMG files compress really well).
Can I open an IMG file like a ZIP to see what’s inside?
Yes, with the right tool. 7-Zip can open most IMG files and show partitions as folders. OSFMount (free) mounts IMG partitions as drive letters in File Explorer. For ext4 partitions inside an IMG (common with Raspberry Pi OS), you’ll need DiskInternals Linux Reader or ext2fsd because Windows doesn’t read ext4 natively.
What’s the difference between disk image and disc image?
Spelling difference reflects the original use case. “Disk” with a k usually means magnetic or solid-state storage (hard drives, SSDs, SD cards). “Disc” with a c usually means optical media (CDs, DVDs, Blu-ray). In practice, the terms are used interchangeably, and Microsoft itself uses “disc image” in Windows 10/11 even when mounting an ISO file that’s never been on a physical disc. Don’t worry about the spelling, just look at what kind of source media the file came from.
Why won’t my IMG fit on a same-size SD card?
Because SD cards labelled as the same capacity aren’t actually identical. Forum testing shows “8 GB” cards can range from 7,384 MB to 7,695 MB, depending on the manufacturer and batch. If your IMG was made from a card on the high end of that range, it can’t fit on one from the low end. The fix: shrink the source partition before imaging (using GParted on Linux), use PiShrink, or buy a slightly larger card for the destination.
Is Win32 Disk Imager still the best tool for IMG files in 2026?
For sector-level read/write of SD cards and USB drives on Windows, yes. The tool hasn’t been updated since version 1.0.0 in March 2017, but the underlying job (copy bytes from removable media to a file and back) hasn’t changed either. balenaEtcher is a more modern GUI alternative for write-only workflows. Raspberry Pi Imager is better if you specifically want to flash Pi OS with custom configuration. But for raw IMG read+write, Win32 Disk Imager is still the standard.
Can I run an IMG file directly without writing it to a card?
Sometimes, yes. If the IMG contains a Linux distro, you can boot it in QEMU directly with qemu-system-aarch64 -drive file=raspios.img,format=raw, no flashing needed. Many Pi developers use this to test changes before deploying, and it’s quite useful. For Windows IMG files (uncommon), Hyper-V can boot a VHD-converted version. For pure raw firmware IMG files (like router firmware), there’s usually no way to run them outside the target hardware.
Is it safe to download an IMG file from the internet?
Depends on the source. IMG files from official project sites (raspberrypi.com, retropie.org.uk, home-assistant.io, octoprint.org) are safe, and you should verify the SHA256 checksum after download. IMG files from random forums or filesharing sites are risky, the same way any executable from a sketchy source is risky. An IMG can contain a complete bootloader, kernel, and filesystem, so a malicious one could install a rootkit on whatever you flash it to. Stick to official sources and you’ll be fine, verify checksums, and don’t be the person who flashes a “Pi OS” file from a Telegram channel.
How do I convert IMG to ISO or vice versa?
For most modern uses, you don’t need to. Win32 Disk Imager, Rufus, balenaEtcher, Ventoy, and Pi Imager all accept both formats. If a specific tool demands one or the other, AnyToISO (free for non-commercial) and PowerISO (paid) can convert. Note: an IMG converted from a raw block device probably won’t be a valid bootable ISO, because ISO 9660 expects a specific filesystem structure that raw disk images don’t have.
What’s a “disk image writer” and is that the same as Win32 Disk Imager?
“Disk image writer” is a generic term for any tool that takes a disk image file and writes it to a physical drive. Win32 Disk Imager is one specific disk image writer, and it’s the one most people land on first. Others include Rufus, balenaEtcher, Raspberry Pi Imager, and the Linux dd command. They all do roughly the same thing for the write direction, with different UIs and features. Win32 Disk Imager’s one of the few that also reads (creates IMG from a drive), which is why it’s still preferred for backup workflows.
Can I free disk imaging software replace Win32 Disk Imager?
For most workflows yes. balenaEtcher is the closest cross-platform alternative for IMG/ISO write workflows. For full Windows system imaging (something Win32 Disk Imager doesn’t do), Hasleo Backup Suite Free or AOMEI Backupper Standard handle scheduled backup, encryption, and incremental imaging. For HDD-to-HDD cloning, Clonezilla or Rescuezilla. The right answer depends on what you’re imaging and why. Win32 Disk Imager remains the simplest tool for the specific case of SD card / USB raw IMG read+write.
Bottom Line
An IMG file is a raw byte-for-byte copy of a disk’s contents. It’s not compressed, it’s not file-aware, and it’s exactly as big as the source drive. By design. That’s what makes IMG the right format for embedded systems, SD card backups, and bootable USB workflows where every sector matters.
I think Win32 Disk Imager’s still the simplest tool for working with IMG files on Windows in 2026. The program hasn’t changed since 2017. Neither has the underlying problem it solves. If you need raw, predictable, sector-level access to removable media, this is still the standard. For everything else, the comparison table above will point you at the right tool, and you won’t regret picking any of the eight options on it.
And if your IMG won’t fit on a same-size card: it’s not your fault, it’s not the program’s fault, it’s the SD card industry not actually agreeing on what “8 GB” means. Buy a slightly bigger card or use PiShrink. That’s the whole story.