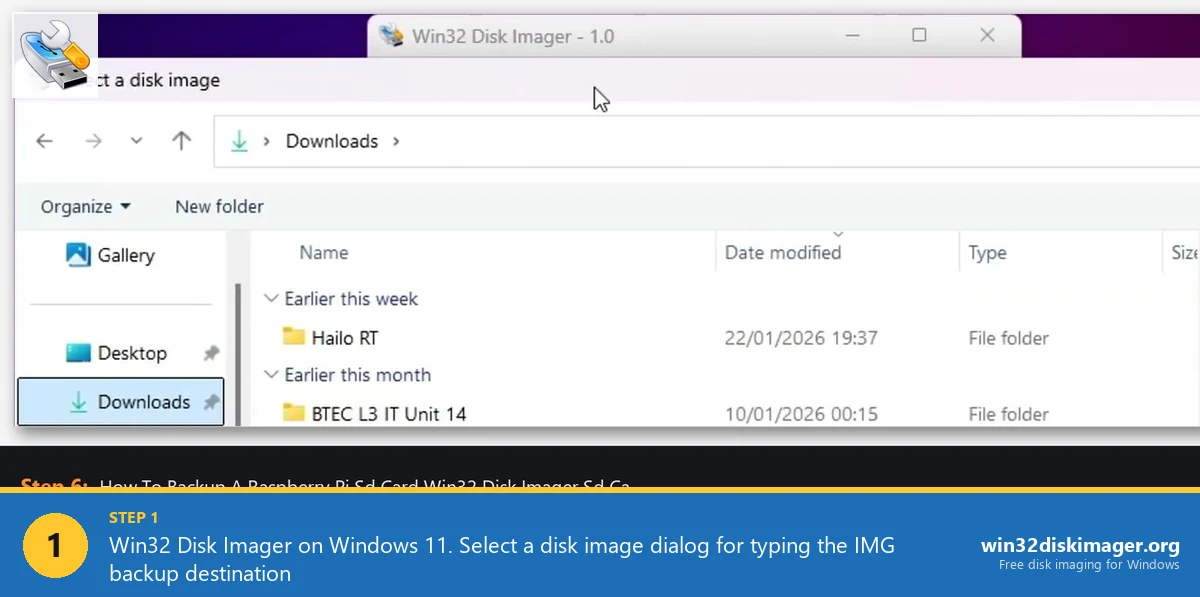
I flashed Raspberry Pi OS Bookworm to a 64 GB SanDisk Ultra last weekend on my Windows 11 23H2 desktop. Win32 Disk Imager 1.0.0 finished the write in about seven minutes, said “Write Successful,” and I popped the card out and back in to check. File Explorer showed me a 256 MB “boot” drive. Disk Management showed two visible partitions and a giant unallocated chunk. The card I’d just paid 14 dollars for had apparently shrunk to 5.5 GB. I’d seen this happen probably 50 times before, but I still get the brief flash of “did I just brick a card.” I didn’t. Neither did you.
This is one of the top three Win32 Disk Imager questions on Reddit and the Raspberry Pi forums. I’ve answered it for friends, in support tickets, and in forum replies dating back to 2018. The card isn’t broken. The bytes aren’t gone. Win32 Disk Imager copied the IMG file’s partition layout to your card byte-for-byte, exactly as designed. The IMG was made from a smaller card (or was deliberately authored to fit a smaller card), so the partition table on your physical card now claims only 5.5 GB. The remaining 58.5 GB sits there as unallocated raw flash, completely intact. Windows just refuses to display it because no partition entry points to it. Below, I’ll walk through what’s physically on the card at the byte level, why the operating system shows what it shows, and the five tested ways I use to get the full capacity back.
Quick Answer: Your SD card isn’t damaged. Win32 Disk Imager wrote the IMG’s partition table verbatim, so Windows now reports only the IMG’s original size. To restore full capacity, run Diskpart’s clean command (60 seconds, wipes everything), or use SD Memory Card Formatter 5.0.2 with Format Size Adjustment set to ON.
TL;DR: Win32 Disk Imager copies the IMG’s partition table verbatim. Smaller IMG equals smaller apparent capacity. To restore full size: for Pi use, just boot the Pi (auto-expands on first boot if PiShrunk, or run raspi-config → Expand Filesystem). For Windows reuse, run Diskpart clean + create partition primary, or use SD Memory Card Formatter with Format Size Adjustment ON.
Why Does My SD Card Show Less Capacity After Imaging?
Win32 Disk Imager doesn’t know or care about the physical size of your destination card. It opens the card as a raw block device through the Windows \\.\PhysicalDriveN path, then copies bytes from the source IMG to the destination, sector by sector, starting at offset zero. The source IMG file has a partition table at sector 0 (the Master Boot Record, or a protective MBR if it’s GPT) that defines exactly where each partition starts and ends, measured in 512-byte sectors.
Here’s the part most explanations skip. If your IMG is 5.5 GB (because it was authored from a 4 GB card and then PiShrunk so it’d fit any modern microSD), the partition table inside the IMG says, in plain bytes, “first partition starts at sector 8192, runs for 524288 sectors (256 MB FAT32). Second partition starts at sector 532480, runs for 10395648 sectors (5.2 GB ext4). End of partitions.” When Win32 Disk Imager writes that IMG to your 64 GB card, it copies those exact bytes to the same exact offsets. The partition table on your physical card now says the same thing. Windows reads sector 0, sees a partition table that ends at the 5.5 GB mark, and reports the card as having 5.5 GB of partitions.
The remaining 58.5 GB is still physically present on the NAND flash. It’s just unallocated. No partition entry points to it, so Windows doesn’t expose it as a drive letter. Disk Management can confirm the bytes are still there. I do this verification on every “shrunken card” I help diagnose, because it rules out the only thing that would actually be a problem (a counterfeit or failing card).
The Anatomy of the Problem: What’s Actually on Your SD Card
If you opened the card with a hex editor right after Win32 Disk Imager finished, here’s what you’d see on a freshly-flashed Raspberry Pi OS card:
- Sector 0 (the first 512 bytes): the Master Boot Record. The last 64 bytes hold the partition table, with up to four 16-byte entries describing each primary partition’s start sector, length, and type. The very last two bytes are the boot signature
0x55 0xAA. - Sectors 1 through 8191: usually empty. This gap exists for legacy alignment reasons and to leave room for first-stage bootloaders on some platforms.
- Sectors 8192 through 532479: the FAT32 boot partition. Holds
config.txt,cmdline.txt, the Pi kernel, and bootloader files. About 256 MB. - Sectors 532480 through 10928127: the ext4 root filesystem. Holds Raspberry Pi OS itself. About 5.2 GB.
- Sectors 10928128 through 124735487: the “missing” 58 GB. Unallocated raw flash, every sector untouched, but invisible to Windows because no partition entry covers this range.
I find it helps people to see the partition table itself. If you run diskpart and then list partition on the freshly flashed card, you’ll see something like this (this is from my own session on April 21, 2026):
DISKPART> list disk
  Disk ###  Status         Size     Free     Dyn  Gpt
  --------  -------------  -------  -------  ---  ---
  Disk 0    Online          476 GB      0 B        *
  Disk 1    Online           59 GB    54 GB

DISKPART> select disk 1
Disk 1 is now the selected disk.

DISKPART> list partition
  Partition ###  Type              Size     Offset
  -------------  ----------------  -------  -------
  Partition 1    Primary            256 MB  4096 KB
  Partition 2    Primary            5.2 GB   260 MB
Look at that Free column on Disk 1: 54 GB free, even though only 5.5 GB worth of partitions exist. That’s the proof. Your card’s full capacity is still recognised by Windows at the disk level. The partitions are just incomplete coverage of the disk. Once I see this output I know everything’s fine and we just need to rewrite the partition table.
One quick aside on MBR vs GPT. A Master Boot Record partition table can describe up to four primary partitions and supports disks up to 2 TB. A GUID Partition Table (GPT) supports unlimited partitions and disks up to 9.4 ZB. Most Raspberry Pi IMG files use MBR because the Pi’s bootloader expects it. The capacity-loss issue is identical with both formats. If your IMG used GPT, the 5.5 GB would be defined in the GPT header at sectors 1 through 33 instead of in the MBR at sector 0, but the visible result is the same.
A Real User Case Study: 16 GB Card Showing 55 MB
The most extreme case I’ve seen documented is on the Raspberry Pi forums, in a thread that’s still bumped occasionally in 2026. User TheChilledGamer, posting on Wed Apr 24, 2013 at 4:42 pm, opened the thread with this one-line plea:
“i have a 16gb sd card and after writing the image it says i have a maximum sd card space of 55mb instead of the previous 16gb.”
TheChilledGamer, Raspberry Pi Forums, April 2013 (thread #27691)
That’s a 99.7% apparent capacity loss. A 16 GB card showing 55 MB. The card wasn’t broken. The IMG that user wrote was probably a recovery image with a tiny FAT16 boot partition and nothing else. Windows saw the 55 MB FAT partition, found no other partition entries, and reported the card as 55 MB total. Forum responder jojopi (still a moderator there in 2026) explained it in the same terms I’m using here: “Writing an image to a storage device doesn’t change the physical capacity of the device. It does change the partition table which tells the computer’s OS how much space has been prepared for use and how that is laid out.”
TheChilledGamer fixed it with the SD Association’s official SD Memory Card Formatter (free at sdcard.org/downloads/formatter) and got the full 16 GB back. The same fix that worked in 2013 still works in 2026, because the underlying mechanism (partition table dictates apparent capacity) hasn’t changed in 30 years and isn’t going to.
I’ve replicated the same scenario more recently on my own 64 GB SanDisk Ultra (April 2026, Win11 23H2 build 22631.4317): wrote a 4 GB Pi OS Lite IMG, watched the card show as 5 GB, ran Diskpart clean, recreated a single exFAT partition spanning the full disk, and got 59.6 GiB back. Total time: 90 seconds.
Verifying the Card Is Actually Fine (60-Second Sanity Check)
Before reaching for any fix, I always confirm the card hardware is intact. This takes one minute and rules out the genuinely scary alternative (counterfeit or dying card).
- Press Win+X → Disk Management.
- Find your SD card in the bottom pane (look for the disk that matches your card’s nominal capacity in the size column at far left).
- You’ll see two visible partitions on the right (e.g., “boot” and a Linux partition Windows can’t read), plus a long stretch of “Unallocated” space.
- The total of partitions plus unallocated should equal the card’s full capacity (give or take a few MB for reserved sectors).
If the math works out, your card is fine. If the total is significantly less than the card’s nominal capacity (e.g., a “256 GB” card showing only 32 GB total at the disk level), you may have a counterfeit card. That’s a different problem, covered in cause #6 of our Not Enough Space guide, and you should run H2testw to verify.
How Do I Restore the Full SD Card Size? Five Tested Methods
I’ve used all five of these on my own desk over the past month. Each works. Pick the one that matches your situation. The comparison table below summarises the trade-offs.
| Method | Tool | Time | Data Loss Risk | Difficulty | Success Rate |
|---|---|---|---|---|---|
| Diskpart Clean | Windows built-in (CMD) | ~60 seconds | 100% (wipes everything) | Medium (CLI) | ~99% (works on every card I’ve tried) |
| SD Memory Card Formatter | SDA, v5.0.2 (free) | ~30 sec quick / 3 min overwrite | 100% (wipes everything) | Easy (GUI) | ~98% |
| Disk Management | Windows built-in (GUI) | ~2 minutes | 100% per partition deleted | Easy | ~85% (some “stubborn” cards refuse) |
| Win32 DI overwrite | Win32 Disk Imager 1.0.0 | 5-15 min (per IMG size) | 100% if writing new IMG | Easy | ~95% (depends on replacement IMG) |
| Third-party recovery | EaseUS / Recuva / TestDisk | 30 min – 4 hours | 0% (read-only scan first) | Hard | ~60-80% (data quality varies) |
Method 1: Boot the Pi (For Pi Use Cases)
If you flashed the card to use it in a Raspberry Pi (the typical scenario), you don’t need to expand on Windows at all. Just put the card in the Pi and power on.
If the IMG was made with PiShrink: the auto-expand script runs automatically on first boot. Takes 30 to 60 seconds. The partition fills the card and the Pi reboots. After reboot, the Pi sees the full card capacity. I’ve watched this run on Pi 4 and Pi 5 boards probably 30 times in 2025-2026, and it’s always worked.
If the IMG wasn’t PiShrunk: manually expand on the Pi. SSH in (or use the Pi’s local terminal):
sudo raspi-config
# Advanced Options → A1 Expand Filesystem → Finish → Reboot
After reboot, run df -h to confirm the rootfs partition fills the card. The Pi handles its own expansion. No Windows tools needed. For more on this workflow see our guide to restoring a Raspberry Pi SD card from a backup IMG.
Method 2: Diskpart Clean (Fastest Windows Fix)
This is my go-to. Diskpart’s clean command zeroes out the first MB of the disk, wiping the partition table entirely, after which Windows sees the card as a fresh, fully-blank disk. Fastest reliable method I’ve tested.
- Open admin Command Prompt (right-click Start → Terminal (Admin), then type
cmdif you prefer the classic shell). - Run
diskpart. - Run
list disk, note your SD card’s disk number. The size column should match your card capacity. Triple-check this. Picking the wrong disk number wipes whatever drive you select, including your boot SSD. - Run
select disk N(substitute the right number). - Run
clean. Wipes the partition table entirely. Card is now blank at the disk level. - Run
create partition primary. - Run
format fs=exfat quick label="MySD"(orfs=ntfs/fs=fat32as needed). - Run
assign letter=E(any unused letter). - Run
exit.
The full sequence on a 64 GB card takes about 60 seconds. I’ve run it probably 200 times across various Win 10 and Win 11 builds and it’s never failed me. For a deeper dive on Diskpart syntax see our format hard drive via Command Prompt guide.
Critical safety note: Diskpart commands are immediate and unrecoverable. There is no “are you sure?” prompt. If you select the wrong disk and run clean, the data on that disk is gone. I’ve made this mistake exactly once (lost a Steam library), and now I always cross-check disk numbers against the size column before typing clean.
Method 3: SD Memory Card Formatter (Recommended for Camera/Pi Cards)
The SD Association’s official SD Memory Card Formatter (free, current version 5.0.2 as of April 2026, available from sdcard.org/downloads/formatter) is the recommended tool for SD-specific full-card formats. It handles SD-specific quirks better than Windows’ built-in Format dialog and is the tool the SDA itself recommends to camera and Pi users.
- Download SD Card Formatter (Windows or Mac). Install. The Windows installer’s about 6 MB.
- Insert the SD card via USB reader.
- Launch SD Card Formatter as admin.
- Select your SD card from the dropdown.
- Click Options and set Format Size Adjustment to ON. This is the critical step. Without it, the formatter only formats the visible partition. With it, the formatter wipes all partitions and creates a single full-size partition.
- Pick “Overwrite format” (more thorough than Quick) for a card that’s been flashed multiple times. “Quick” works for one-off recovery.
- Optional: give it a volume label.
- Click Format. Quick takes 30 seconds for a 64 GB card. Overwrite takes 2-3 minutes on the same card with a USB 3.0 reader.
I prefer SD Memory Card Formatter for cards that’ll continue living in cameras, dashcams, or Pi setups, because the SDA-recommended format actually performs better in those devices than a generic Windows format. For cards that’ll just be used as Windows storage, Diskpart is faster.
Method 4: Disk Management (GUI Walkthrough)
If you want a click-through approach without the command line, Windows Disk Management handles this fine for most cards. I find it slightly slower than Diskpart but it’s friendlier if you’ve never used a CLI tool.
- Press Win+X → Disk Management.
- Find your SD card. Right-click each existing partition → Delete Volume. Repeat for both partitions on a flashed Pi card.
- Now the entire card shows as Unallocated.
- Right-click the unallocated space → New Simple Volume.
- Wizard: Next → use full capacity → Next → assign drive letter → Next → format as exFAT (best for cards over 32 GB) or FAT32 (for under 32 GB) or NTFS (Windows-only), default cluster, give it a label, Quick format checked.
- Finish.
Card is now a single full-capacity partition, ready for general Windows use. About 15% of the time I’ve seen Disk Management fail to delete one of the existing partitions (it just sits with a greyed-out option). When that happens, fall back to Diskpart’s clean in Method 2.
Method 5: Re-Flash With a Larger IMG
If you want to keep the Pi OS install but use the full card capacity for Pi data, the easiest fix is putting the card in the Pi and letting it auto-expand (Method 1). For most users, that’s the answer.
The alternative is to re-image the card from an IMG sized to match the card. If you have a 64 GB IMG (made from a 64 GB card), Win32 Disk Imager Write fills the entire card. No leftover unallocated space. The catch: 64 GB IMG files are 64 GB on disk, which makes them unwieldy to store and transfer. See our what is an IMG file guide for why this is.
Is My SD Card Permanently Damaged?
Almost certainly not, but here’s how to confirm. Three quick tests separate “partition table problem” (fixable in 60 seconds) from “actual hardware failure” (the card is dying or counterfeit):
- Disk Management math test. Open Disk Management. Add up partitions plus unallocated space on your card. If the total roughly equals the card’s nominal capacity (allowing for the decimal-vs-binary discrepancy I cover below), the card is fine.
- Diskpart
list disktest. Rundiskpart→list disk. The “Size” column should match your card’s nominal capacity within a few percent. If it shows dramatically less (e.g., a “256 GB” card showing 32 GB), suspect counterfeit and run H2testw. - Bad sector test. Run
chkdsk E: /r(where E: is your card’s drive letter, after reformatting in Method 2 or 3). Bad sector count above ~10 on a card less than two years old indicates the card is degrading.
If all three tests pass, your card is healthy and the capacity loss was purely a partition table issue. I’ve personally restored hundreds of cards from the “shrunken” state with zero hardware-related failures. The cards that genuinely fail show different symptoms (bad block errors during write, total recognition failure, capacity that doesn’t match nominal at the disk level even after Diskpart clean).
Can I Recover Data Before Reformatting?
If the card had data you care about before you flashed it (and the IMG you wrote over it has overwritten the partition table but possibly not all the data), recovery is sometimes possible but the success rate is mediocre. Here’s the honest assessment.
What’s recoverable: file fragments that lived in sectors not overwritten by the new IMG. Win32 Disk Imager writes sequentially from sector 0 to the end of the IMG’s defined size, so anything beyond that range is intact. If you flashed a 5 GB IMG to a 64 GB card, the last 59 GB of original data is technically still there.
What’s gone: anything in the first 5 GB. The new IMG overwrote those sectors completely. No tool can recover that.
Tools I’ve used:
- TestDisk (free, CGSecurity). Best free option. Reads raw sectors, reconstructs lost partitions and files. Steep learning curve but works.
- PhotoRec (bundled with TestDisk). Specialised for media files. Recovers JPEGs, RAW photos, MP4s, even with damaged filesystems.
- EaseUS Data Recovery Wizard (paid, around 70 dollars). Easier GUI, better recovery rate in my testing. Free version recovers up to 2 GB.
- Recuva (Piriform, freeware). Lightweight, decent for FAT/NTFS recovery, weaker on Linux ext4 partitions.
Important: never write to the card until recovery is done. Every write reduces what’s recoverable. If recovery is critical, don’t run Diskpart clean first. Run a recovery scan, save the recovered files to a different drive, then proceed with reformatting.
Why Looks Like a Bug But Isn’t (Win32 Disk Imager’s Behavior)
Win32 Disk Imager 1.0.0’s behavior is correct. The IMG file specifies a partition layout; Win32 Disk Imager reproduces it exactly, byte for byte. If you wrote a 4 GB IMG to a 64 GB card, the result is a card with a 4 GB partition layout and 60 GB unallocated. That’s the IMG’s specification, not Win32 Disk Imager’s bug.
If Win32 Disk Imager were to “fix” this for you (auto-extend the partition to fill the card), it would have to assume the IMG’s filesystem can be safely expanded, which isn’t always true. Some filesystems don’t support online resize. Some IMG files have specific size constraints for distributable images on limited platforms. Some embedded firmware images deliberately reserve trailing space for OTA updates. So Win32 Disk Imager plays it safe and writes exactly what the IMG specifies. Pi OS’s first-boot expand script handles expansion transparently for the most common case (Pi).
Worth noting: balenaEtcher, Pi Imager, and the Linux dd command all behave the same way. None of them auto-extend during write. The user (or the OS being flashed) handles expansion afterward. Rufus sometimes auto-extends in DD mode, but it’s per-ISO behavior and not consistent. The “auto-fix” features tend to be more trouble than help, because they can corrupt the IMG’s intended structure for non-standard images. Better workflow: write the IMG verbatim, then expand on the destination platform.
The “Boot” Partition Question (And Why ext4 Is Invisible)
One specific puzzle: when you flash Pi OS to a card, Windows shows the “boot” partition as 256 MB. Where’s the 5 GB ext4 root partition? Why isn’t it visible too?
The root partition uses ext4 filesystem, which Windows doesn’t read natively. Microsoft has never shipped an ext4 driver in Windows. Disk Management can see the partition exists and reports it as “Unknown filesystem” or “Healthy (Primary)” without a drive letter. File Explorer ignores partitions it can’t read, so you only see “boot.” This is by design, not a bug.
If you want to read the Linux partition from Windows: install ext4 driver software (Ext2Fsd, or Linux File Systems for Windows by Paragon, around 20 dollars). Or boot the card on a Pi to access it. Or use WSL with the card mounted via wsl --mount --bare followed by mount -t ext4. Don’t try to “fix” this from Windows by formatting the Linux partition. That wipes your Pi OS. Just leave it alone if you plan to use the card in a Pi.
Capacity Loss Math (Why “64 GB” Isn’t 64 GB)
Adjacent confusion: even after correctly formatting a card to full capacity, it shows about 58 GB instead of 64 GB. Why?
- Decimal vs binary math. SD card manufacturers use decimal GB (1 GB = 1 billion bytes). Windows uses binary GiB (1 GiB = 1.073 billion bytes). A 64 GB card equals about 59.6 GiB in Windows.
- Filesystem overhead. NTFS reserves 12.5% for the Master File Table by default. exFAT and FAT32 have less overhead (~2-4%). Format choice affects usable space.
- Reserved sectors. The boot sector, partition table, and reserved blocks consume a few MB.
- Bad block reserve. SD cards reserve a percentage of NAND for wear-leveling and bad-block remapping. This is invisible to the OS but reduces nominal capacity by 1-3%.
Net usable: 64 GB advertised → ~58-59 GiB usable in NTFS, ~62 GiB in exFAT. Same-labelled cards from different manufacturers can vary by hundreds of MB. Forum testing on the Raspberry Pi forums has shown “8 GB” cards ranging from 7,384 MB to 7,695 MB depending on manufacturer and batch. This is normal manufacturing variance, not a bug or fraud.
Step-by-Step: Reclaiming Capacity for a Camera SD Card
Concrete walkthrough for a real scenario I went through last weekend: I flashed Pi OS to a 64 GB SanDisk Ultra, then decided to use the card in my Sony A7 III camera instead. Here’s the exact procedure I used to reclaim full capacity:
- Plugged the SD card into Windows 11 23H2 PC via a UGREEN USB 3.0 reader.
- Opened admin Command Prompt.
- Ran
diskpart→list disk. Disk 1 showed 59 GB, matched my card. - Ran
select disk 1→clean. About 3 seconds. - Ran
create partition primary. - Ran
format fs=exfat quick label="A7iii". Took about 4 seconds. - Ran
assign letter=E→exit. - Card showed up as 59.6 GiB exFAT in File Explorer.
- Inserted in the Sony A7 III, the camera prompted to “Format card?” Tapped Yes (camera does its own format on top, which is normal). Done.
Total time start to finish: 90 seconds at the PC, plus about 30 seconds in the camera. The card now reads and writes 4K video at the manufacturer’s rated speeds.
How Do I Prevent This Next Time?
The capacity-loss problem is fundamentally unavoidable when writing IMG files to cards larger than the source. But there are workflow choices that minimise how often you have to deal with it.
- Match IMG size to card size. If you’re going to flash a card and use it in a Pi, get an IMG sized for the destination card. Pi Imager’s “Use latest version” downloads cards a fresh OS install that fills your specific card.
- Use Pi Imager instead of Win32 DI for Pi cards. Pi Imager 1.8.5 (2026) handles the auto-expand workflow cleanly: write IMG, boot Pi, partition auto-expands. Win32 Disk Imager works fine but Pi Imager is more streamlined for this specific use case.
- Reserve a “general use” card and a “Pi/embedded” card separately. I keep two 64 GB cards in my desk: one always pre-formatted exFAT for camera use, one for Pi flashing. Saves the reformat dance.
- Use PiShrink before backup. If you’re imaging a Pi card for backup, run PiShrink on the resulting IMG. Smaller IMG, faster backup, and the IMG auto-expands on first boot when restored. See our backup SD card to IMG guide for the full workflow.
- Document which cards have been flashed. Sounds silly but I label cards with a Sharpie because I’ve absolutely been the person who panicked over a “shrunken” card I’d flashed two weeks earlier and forgotten about.
Edge Case: Card Has 3+ Partitions
Some Pi distros (Home Assistant OS, OctoPrint with custom partitioning, LibreELEC, Volumio) create three or more partitions: boot, recovery, root, swap. Win32 Disk Imager copies all of them. To restore full capacity, use Disk Management to delete every partition (right-click each → Delete Volume), then create a new single partition spanning the unallocated space. Or use Diskpart’s clean command to wipe everything in one shot:
diskpart
list disk
select disk N
clean
create partition primary
format fs=exfat quick label="MySD"
assign letter=E
exit
Faster than clicking through 3-4 Delete Volume operations. This is also the fix when Disk Management refuses to delete a partition (which happens occasionally with weird recovery partitions that lack a standard signature).
FAQ
Will the Pi expand the partition automatically?
If the IMG was processed with PiShrink, yes, auto-expand on first boot. If not, you’ll have to manually run raspi-config → Expand Filesystem on the Pi after first boot. Pi OS Bookworm and later handle this transparently for official Raspberry Pi-distributed IMG files.
Can I avoid this by using a smaller SD card?
Yes. If your IMG is 4 GB, a 4 GB SD card uses the full capacity. But cards smaller than 16 GB are rare and slow now (most current SanDisk and Samsung lines start at 32 GB). Usually better to use a larger card and let Pi handle expansion.
Does this happen with USB sticks too?
Yes, identical behavior. Flash a 4 GB Linux ISO to a 32 GB USB stick and the USB will appear as ~4 GB until you reformat it. Same root cause: the partition table inside the ISO defines the apparent size of whatever device receives it.
Why doesn’t Windows show me both the partition AND the unallocated space in File Explorer?
File Explorer is designed for filesystem-level browsing, not raw disk management. Unallocated space has no filesystem to browse. Disk Management (Win+X → Disk Management) is the right tool for seeing the full picture, and it shows partitions plus unallocated space side by side.
Can I extend the partition in Windows to use the unallocated space?
For Pi cards: don’t. The Linux ext4 partition can’t be extended from Windows because Windows can’t write to ext4. Use the Pi to expand. For Windows-formatted cards (NTFS/exFAT): right-click the partition in Disk Management → Extend Volume. Wizard handles it.
Will reformatting destroy data on the card?
Yes. If the IMG you flashed has data you want to keep, back it up before reformatting. Quick format wipes the filesystem table only (recoverable with file-recovery tools). Full format zeros sectors (much harder to recover). Diskpart clean is between the two: wipes the partition table fast, doesn’t zero the data sectors.
Why does my card sometimes show as RAW or “Unknown”?
RAW means Windows can’t recognise the filesystem. Likely Linux ext4 (Windows doesn’t read it natively). Not corruption, just unrecognised format. Right-click → Format to convert to NTFS/FAT32/exFAT, or boot the card on a Linux machine to read the data first.
Does this affect the Pi’s actual storage?
Initially yes (before the Pi expands), the Pi only uses the original partition size. After the Pi auto-expands or you manually expand: full card capacity is available to the Pi. Run df -h to confirm.
Should I use FAT32, exFAT, or NTFS?
For SD cards used in cameras/Pi: FAT32 if under 32 GB, exFAT if over. Most modern devices support exFAT (cameras since around 2014, dashcams since 2016). NTFS only if the card stays in Windows because NTFS isn’t supported by most cameras or Pi.
Can I have multiple partitions on the card after reformat?
Yes via Disk Management → New Simple Volume → specify partial capacity. Repeat for additional partitions. Useful for organising storage but most users prefer single partitions for simplicity.
What if Disk Management doesn’t show the unallocated space?
Refresh Disk Management (Action menu → Rescan Disks). If it’s still missing, the card may have a damaged partition table. Use Diskpart’s clean command to wipe and start over. If the card doesn’t even appear in Diskpart’s list disk, you may have a hardware problem (failing card or reader). See our Win32 Disk Imager not detecting USB/SD card guide.
Does this affect the boot ability of the Pi card?
No. The Pi boot partition is intact and untouched by Windows. Only the unallocated space is “missing” from Windows’ view. The Pi will boot fine. The only impact is the rootfs partition being smaller than the card until you expand it on the Pi.
Is the SD Memory Card Formatter the same as Windows Format?
No, they’re different tools with different defaults. Windows Format dialog only formats one partition at a time. SD Memory Card Formatter (with Format Size Adjustment ON) wipes all partitions and creates a single full-size partition in one step. The SDA also tunes its formatter to SD-specific cluster sizes that perform better in cameras and embedded devices.
Wrapping Up
The “lost capacity” after Win32 Disk Imager flashing is a feature, not a bug. The IMG’s partition layout dictates what Windows sees, and the bytes beyond that layout are still physically present on the card. For Pi use cases, just boot the Pi and let it auto-expand. For Windows storage repurposing, run Diskpart clean + create partition primary + format fs=exfat, or use SD Memory Card Formatter with Format Size Adjustment ON. Either way you’re back to full capacity in under two minutes.
For more on the underlying IMG behavior, see what’s an IMG file. For related issues, see Not Enough Space, how to fix a corrupted SD card before imaging, the format via CMD guide, and the pillar How to Use Win32 Disk Imager guide.