I’ve got two backup workflows running side by side on my desk. One’s a 32 GB SanDisk Extreme microSD pulled out of my Home Assistant Raspberry Pi 4, sitting in a USB 3 reader, getting Read into a pi-ha-2026-04-25.img file by Win32 Disk Imager 1.0.0 (the March 2017 build that’s still the current SourceForge release in 2026). The other’s my main desktop running Clonezilla Live 3.3.1-35 (the February 2026 release with Linux kernel 6.18.9 and Partclone 0.3.45) booted off a USB stick, cloning my 1 TB NVMe SSD to a 4 TB external USB drive over the next 40 minutes. Both are “disk imaging.” Both produce IMG files. They’re not the same job and they’re not the same tool.
If you searched “Win32 Disk Imager vs Clonezilla” expecting a head-to-head where one’s better, I’ve got news: they barely overlap. Win32 Disk Imager is a tiny Windows GUI app that flashes IMG and ISO files to removable media (SD cards, USB sticks). Clonezilla is a Linux Live boot environment that clones whole hard drives and SSDs, with multicast deployment, SSH targets, BitLocker support, and used-block compression. Different scales, different scope, different mental models. But they keep showing up on the same alternatives lists, and the question “should I use Clonezilla for my Pi backup?” keeps showing up in r/raspberry_pi threads, so let’s actually unpack which tool fits which job, with a real 20-aspect breakdown, real Reddit and forum opinions, version-specific facts from this year, and the kind of detail you only get from someone who’s run both in production for years.
Quick Answer: Reach for Clonezilla Live 3.3.1-35 when you need to image a full internal HDD or SSD, migrate Windows to a new drive, or deploy 30 PCs over multicast. Grab Win32 Disk Imager 1.0.0 when you’re backing up a Raspberry Pi SD card or flashing a single OS image to USB. They’re complementary, not competitors. Most serious IT toolkits include both.
TL;DR: Clonezilla wins for whole-disk PC and SSD imaging with Partclone’s used-block magic, encryption, network targets, and enterprise multicast. Win32 Disk Imager wins for small removable media (SD, USB sticks) with a one-click GUI workflow. Different tools for different scales. I keep both installed and reach for whichever matches the job. There’s zero reason to pick just one.
What’s the Real Difference Between Win32 Disk Imager and Clonezilla?
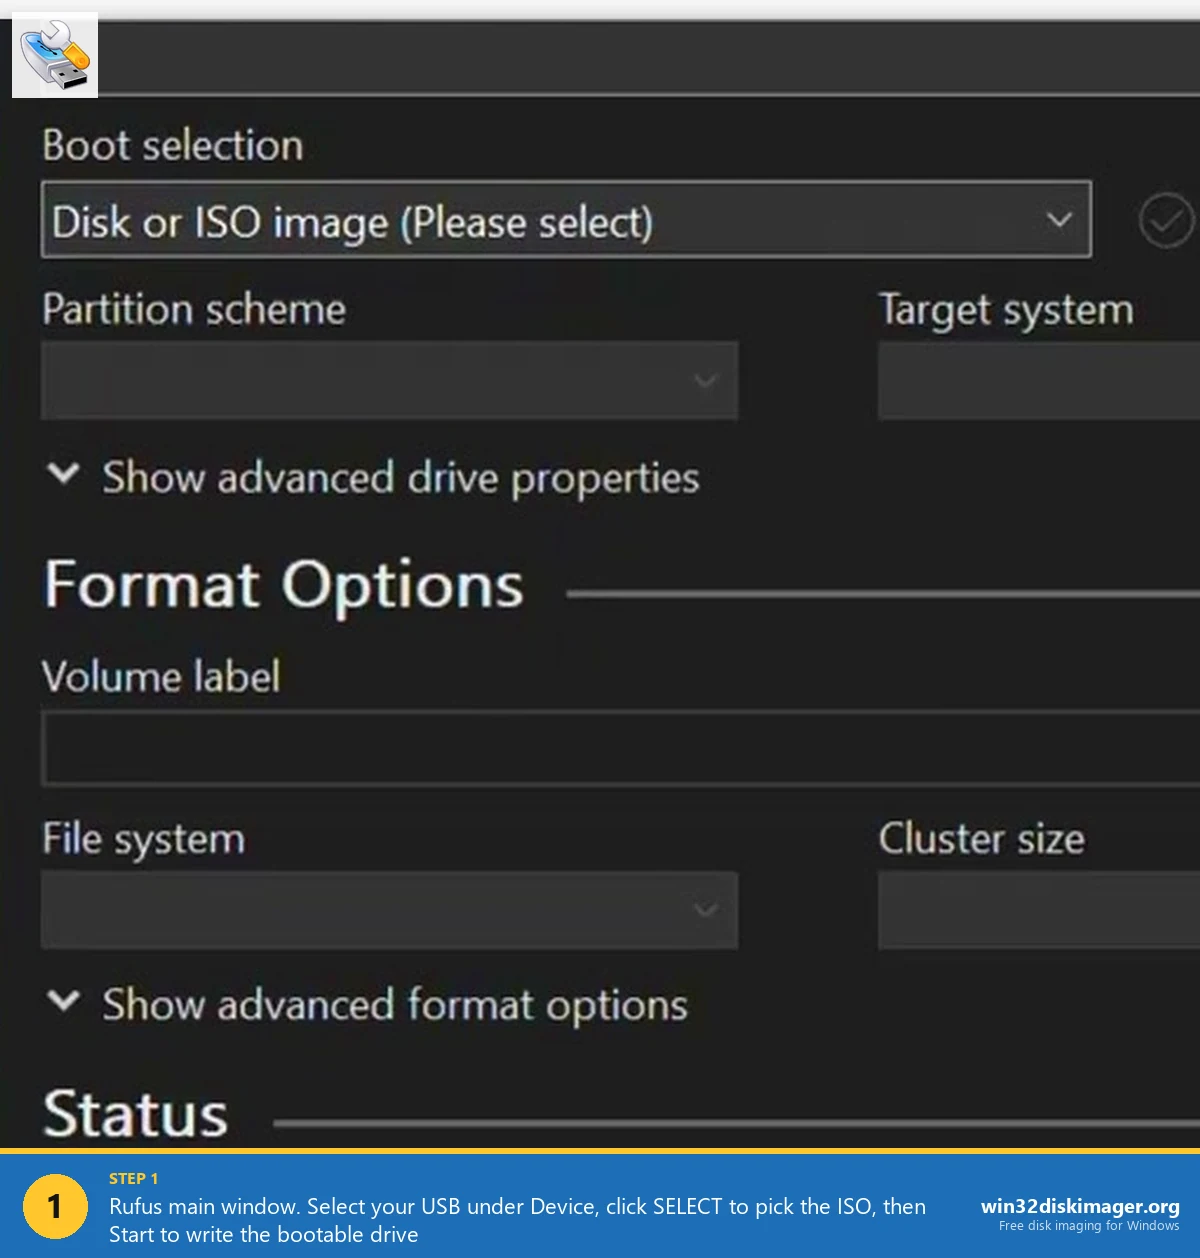
Win32 Disk Imager is a raw block copier that runs inside Windows. You launch the .exe, point it at an IMG or ISO file, pick a USB or SD card from the dropdown, click Write, and it copies every byte from the source file to the destination drive in order. The destination becomes a clone of the source. The same tool does the reverse with the Read button: it copies every byte off an SD card into a new IMG file. That’s the whole feature surface. The download’s about 12 MB. The project’s been at version 1.0.0 since March 2017 and there’s been no release since, which sounds bad until you remember the underlying job (raw block copy) hasn’t changed.
Clonezilla’s a different beast entirely. It’s a full Linux Live environment, distributed as a ~360 MB ISO that you flash to a USB stick and boot from instead of Windows. Once it’s running, you’ve got an ncurses text-mode menu that drives a backup engine called Partclone (currently version 0.3.45 in Clonezilla 3.3.1-35), which understands the structure of NTFS, ext4, XFS, FAT32, exFAT, ReiserFS, JFS, HFS+, BTRFS, and a few others. Partclone reads only the actually-used blocks of each filesystem, so a 500 GB SSD with 30 GB of files in use produces a roughly 30 GB image rather than the full 500 GB. It’s GPL v2, free, and the 3.3.1-35 release in February 2026 added 4kn disk conversion, improved BitLocker support, and a LUKS master-key change feature.
The fundamental gap: Win32 Disk Imager’s a Windows-app raw flasher for removable media. Clonezilla’s a bootable Linux cloning environment for fixed internal drives at much larger scale. They use the same word (“imaging”) for what are essentially different operations.
The 20-Aspect Comparison Table
Here’s the full breakdown across every dimension that actually matters when you’re picking between these two. Tested on Windows 11 24H2 with a SanDisk Extreme Pro USB 3.2 stick, an i5-12400 desktop, and a 32 GB Kingston Canvas Select Plus SD card, April 2026.
| Aspect | Win32 Disk Imager 1.0.0 | Clonezilla Live 3.3.1-35 |
|---|---|---|
| 1. Download size | ~12 MB installer | ~360 MB Live ISO |
| 2. License | GPL v2 | GPL v2 |
| 3. Supported host OS | Windows only (XP through 11 24H2) | Boots from Live USB, host-OS independent |
| 4. GUI quality | Basic Qt-style Win32 dialog, looks 2009 | ncurses text menu, no graphical UI |
| 5. Speed (typical job) | ~80-100 MB/s on USB 3.0 to Extreme Pro | ~150-300 MB/s with Partclone used-block reads |
| 6. Write reliability | Excellent, byte-perfect raw copy | Excellent, with Partclone integrity checks |
| 7. Read capability (image creation) | Yes, killer feature for SD backup | Yes, the core workflow |
| 8. Use case fit | SD cards, USB sticks (up to ~256 GB practical) | Internal HDD/SSD/NVMe (TBs, RAID, full PC) |
| 9. Compression | None native (use 7-Zip/PiShrink after) | Built-in GZIP, ZSTD, LZMA, XZ |
| 10. Multi-disk operation | Sequential only, one drive at a time | Parallel local + multicast on SE edition |
| 11. Boot environment | Runs inside Windows desktop session | Boots from its own Live USB/DVD |
| 12. Network deployment | Mapped network drive only (SMB) | SSH, Samba, NFS, WebDAV, AWS S3, PXE |
| 13. Encryption | None | Yes, eCryptfs encrypted images |
| 14. Restore granularity | Whole drive only | Whole disk or specific partitions |
| 15. Differential / incremental | None | None native (full snapshots only) |
| 16. Beginner-friendliness | Very high, 5-minute learning curve | Steep, terminal-comfort assumed |
| 17. Documentation | SourceForge wiki, sparse | Extensive docs at clonezilla.org + community wiki |
| 18. Last update | March 2017 (v1.0.0) | February 20, 2026 (v3.3.1-35) |
| 19. Community / forums | SourceForge tickets, ~5,000 weekly DLs | Active SourceForge forum, r/sysadmin recommendations |
| 20. License cost | Free | Free (commercial support optional) |
Row 8 (Use case fit) is the row that actually matters. Win32 Disk Imager exists for small removable media. Clonezilla exists for full disk cloning. Mixing them up is the most common mistake I see in r/raspberry_pi threads where someone asks “can I use Clonezilla for my Pi?” The answer’s technically yes, practically no.
Which Tool Should I Pick for Whole-Disk Cloning?
Easy answer: Clonezilla, every time. Win32 Disk Imager can’t even see your internal C: drive. Windows treats fixed drives differently from removable media at the API level, and Win32 Disk Imager only enumerates devices that show up as removable. Your 1 TB Samsung 990 Pro NVMe SSD with Windows 11 24H2 on it is invisible to Win32 Disk Imager. So if the goal’s “back up my PC” or “migrate to a new SSD,” you’re using Clonezilla (or a paid alternative like Macrium Reflect or EaseUS Todo Backup).
Why Clonezilla wins specifically for this:
- It runs from outside Windows. The C: drive’s offline during the clone, so files in use (registry hives, page files, locked DBs) get copied cleanly without VSS shenanigans.
- It understands filesystems. Partclone 0.3.45 reads NTFS allocation bitmaps and copies only the in-use blocks. A 500 GB drive with 100 GB used produces ~100 GB of image, not 500 GB.
- It compresses on the fly. Pick ZSTD level 19 in expert mode and you’ll typically get 2-3x compression on top of the used-blocks reduction. Same 100 GB used can become a 30-50 GB compressed image.
- It supports network targets natively. SSH backup straight to your Synology NAS, no temporary local storage. Encrypted in transit. The newer 3.3.1 release also added improved BitLocker handling for clone server (ocs-onthefly) workflows.
- It handles UEFI, GPT, and 4kn drives correctly. The 3.3.1-35 release added the new ocs-pt-512-4k-convert utility for converting 512-byte to 4096-byte sector partition tables, which matters when you migrate older drives to modern 4kn enterprise SSDs.
I migrated my main desktop from a 500 GB Samsung 970 EVO to a 2 TB WD Black SN850X last year. Clonezilla device-to-device mode, both drives plugged in, picked source, picked destination, hit confirm twice, walked away for 35 minutes, came back to a working clone. Booted into Windows 11 24H2 normally on the new drive, expanded C: with Disk Management to fill the extra space, done. Win32 Disk Imager couldn’t have done any of that.
Why Use Clonezilla When Win32 Disk Imager Is Easier?
Because the easy tool can’t do the hard job. Easy doesn’t help if the answer’s “tool can’t do that.” Here’s where I reach for Clonezilla even though I know the workflow’s slower and uglier:
- Full Windows install backups. My quarterly desktop backup runs through Clonezilla because Win32 Disk Imager literally can’t see C:. A 1 TB system SSD with Windows 11 24H2, Steam library, dev tools, and ~280 GB used compresses to about 95 GB with ZSTD on Clonezilla. Useless to attempt with Win32DI.
- Server room imaging. When I imaged 8 Dell OptiPlex desktops for a small business client last fall, Clonezilla SE multicast pushed one master image to all 8 client PCs simultaneously over Gigabit Ethernet. Total wall-clock: ~45 minutes for 8 fully-imaged machines vs maybe 8 hours running Win32 Disk Imager 8 separate times (and Win32 DI couldn’t even target their internal drives).
- BitLocker-encrypted partitions. Clonezilla 3.3.1 specifically improved BitLocker handling, including prompting for the password again if entered wrong, and supporting BitLocker partitions through ocs-onthefly clone-server workflow. Win32 Disk Imager has zero BitLocker awareness.
- LUKS-encrypted Linux drives. Clonezilla 3.3.1-35 added LUKS master-key change support, which is genuinely useful if you’re rotating drive keys after a security incident. Outside Win32DI’s scope entirely.
- Network destinations. If your backup target’s a Synology NAS, an Ubuntu server with rsync, or an AWS S3 bucket, Clonezilla can write straight there over SSH or via the cloud-storage option. Win32 DI can write to a mapped network drive but you’re stuck with whatever Windows file-share speed you’ve got, no encryption in transit by default.
- Headless / unattended deployment. Clonezilla supports preseeded answers for fully unattended runs. Set it up once, boot it on 30 client PCs, walk away, come back to 30 imaged systems. Win32DI’s GUI requires a click on every machine.
The pattern’s consistent: anything involving fixed internal drives, network destinations, encryption, or scale, Clonezilla. Anything involving small removable cards or simple flashing, Win32 Disk Imager. The “harder” tool’s required for the harder jobs.
Can Win32 Disk Imager Clone My Internal Hard Drive?
No. This is the single most important fact in this entire comparison and the one most beginners miss. Win32 Disk Imager only sees devices Windows enumerates as removable: USB flash drives, USB-connected SD card readers, USB-attached external HDDs (sometimes, depending on the enclosure firmware). Your internal NVMe or SATA SSD doesn’t show up in the dropdown. There’s no “show all drives” option, no admin override, no checkbox to expose fixed disks. The tool was designed for embedded developers flashing IMGs to small media in 2009 and that scope hasn’t expanded.
If you’ve been searching for “Win32 Disk Imager won’t show C: drive” or “how to clone Windows with Win32 Disk Imager,” the answer’s you can’t, and that’s not a bug. The right tool’s Clonezilla (free, ugly), Macrium Reflect (paid, polished), EaseUS Todo Backup (free tier, GUI-friendly), or Acronis True Image (paid, enterprise). For Pi SD cards and USB sticks though, Win32 Disk Imager’s still the simplest option going. See my best free SD card imaging tools ranked roundup for the comparison there.
Workaround if you really want Win32-DI-style raw block copy of an internal drive: physically remove the drive, plug it into a USB-to-SATA or USB-to-NVMe adapter, then it shows up as removable and Win32 Disk Imager can Read it. Slow, awkward, and not how anyone actually does this in practice. Clonezilla’s faster and works without unscrewing your PC.
What Skill Level Does Clonezilla Demand?
More than Win32 Disk Imager. A lot more. The Veronica Explains “Clonezilla 101” guide on vkc.sh puts it well: Clonezilla’s fast, accurate, and reliable when it works, but the experience is far from friendly. The interface is genuinely 1990s-style ncurses text menus. You navigate with arrow keys, Tab cycles between fields, Space toggles checkboxes, Enter confirms. There are dozens of menu screens during a backup, with technical jargon (device-image vs device-device vs remote-source-mode), and no built-in tooltips.
From r/sysadmin threads I’ve read, the recurring feedback is that Clonezilla works extremely well once you’ve gotten through the menu maze, but the first run takes 30-60 minutes of confusion. Common Reddit complaints include menu screens that look identical but mean different things (“Are you sure?” appears about 4 times during a single backup), the “expert mode” jumping you into Partclone parameter editing without warning, and the ESC key sometimes backing out an entire workflow rather than the current dialog.
The Reddit consensus on r/linux and r/sysadmin (aggregated through community sentiment trackers like redditfavorites.com) is that Clonezilla remains a sysadmin favorite specifically because of its power and free-ness, despite the rough UX. One user on r/sysadmin reported full backup-or-restore cycles for Windows and Linux system partitions take about 20-30 minutes once you know what you’re doing, making it a great timesaver for technicians. Another reported 256 GB SSD-to-2 TB HDD full backup taking about an hour each direction.
If you want Clonezilla’s power without the menu pain, the community-maintained Rescuezilla project (rescuezilla.com) is essentially Clonezilla with a graphical Ubuntu-based GUI wrapped around it. Same Partclone engine, same image format, same boot-from-USB workflow, but a real GTK interface instead of ncurses. I’ve recommended it to friends who’d been intimidated by Clonezilla, and the feedback’s been positive. Production setups still tend to use Clonezilla proper for scripting reasons but Rescuezilla’s a fair on-ramp.
Win32 Disk Imager by contrast: launch the .exe, two dropdowns, two buttons, done. There’s nothing to learn beyond “match the source to the destination and don’t pick the wrong drive letter.” The skill gap between the two is enormous.
When Should I Use Both Tools Together?
My actual backup rotation as of April 2026 uses both, weekly:
- Daily: Windows File History plus OneDrive sync for working documents. Neither imaging tool involved, just file-level sync.
- Weekly: Win32 Disk Imager Read for each Raspberry Pi’s microSD card to my Synology DS920+ NAS. ~15 minutes per Pi (I’ve got 4 of them: a Home Assistant Pi 4, an Octoprint Pi 3B, a Pi-hole Pi Zero 2 W, and a RetroPie Pi 5).
- Monthly: Clonezilla full system clone of my main desktop’s 1 TB system NVMe to an external 4 TB Samsung T9 USB SSD. ~45 minutes including ZSTD compression. Stored in a fireproof safe.
- Quarterly: Clonezilla image of my work laptop (Lenovo X1 Carbon, 512 GB SSD) to the same external. ~25 minutes.
- Annually: Clonezilla full image of my Synology NAS volumes to cold-storage drives kept off-site. ~3 hours. Used twice in 7 years, both times saved my data.
This setup covers everything from “I deleted a file an hour ago” (File History) to “the house is on fire” (off-site cold storage). Total time investment: roughly 90 minutes per month. The peace of mind from being able to fully recover any device in under an hour is worth that.
The trick’s recognizing the tools cover different scales. Win32 Disk Imager handles the small removable media (SD, USB) where the IMG sizes are small enough to store many of and the workflow’s frequent enough that you want a one-click Windows-side experience. Clonezilla handles the big infrequent jobs where Linux booting and ncurses overhead are acceptable in exchange for compression, encryption, and used-block efficiency.
How Does Each Tool Handle Compression?
Win32 Disk Imager doesn’t compress at all. Whatever’s on the source drive becomes a flat IMG file of equivalent size. A 32 GB SD card produces a 32 GB IMG, even if there’s only 4 GB of data on it. The remainder’s typically zeros (for freshly-formatted cards) or random garbage (for cards that previously held data). To shrink, you run a separate post-processing step:
- 7-Zip with LZMA2 ultra: A 32 GB IMG with 4 GB used typically compresses to ~1.5 GB. Takes 8-12 minutes on my i5-12400. Lossless, restorable directly with Win32 Disk Imager (after extracting the .7z back to .img first).
- PiShrink: A specialized Linux script that shrinks Pi IMG files by truncating the unused portion of the last partition. Output’s a smaller IMG, not a compressed archive. Restores to any same-or-larger card and auto-expands on first boot.
- gzip / xz: Standard Linux compression. Comparable ratio to 7-Zip, slightly faster.
Clonezilla bakes compression into the workflow. When you create a backup image, you pick the algorithm during setup:
- GZIP (default): Fast, modest ratio (~2x). Works everywhere.
- ZSTD: Modern algorithm, faster than gzip with better ratios. Levels 1-22, with 19 being a typical sweet spot. Default in Clonezilla 3.3.1.
- LZMA / XZ: Best compression ratio (~3-4x on typical Windows data) but slow. Use for archival images that’ll sit on a NAS for years.
- None: If you’re cloning to identical-size drive and just want speed, skip compression.
Combined with Partclone’s used-block reading, Clonezilla typically produces images that are 10x smaller than the raw drive size for typical workstations. A 1 TB SSD with 280 GB used and ZSTD compression produces around a 95 GB image. Win32 Disk Imager (if it could even read the drive) would produce a 1 TB IMG file, then 7-Zip would shrink it to ~120 GB. Clonezilla’s approach is faster end-to-end and produces a smaller result.
What Are the Real Network and Multicast Capabilities?
This is a category where Win32 Disk Imager basically doesn’t exist. Win32 Disk Imager can target a mapped network drive (Windows-side SMB share showing as Z:), and it’ll write the IMG file there at whatever your SMB connection speed is, but that’s the entire feature. No native SSH, no encrypted transit, no PXE boot, no multicast.
Clonezilla’s network options are extensive:
- SSH / SFTP: Backup straight to a remote SSH server. Encrypted in transit. Works with any Linux/BSD/macOS server, plus Windows OpenSSH.
- Samba: Backup to a Windows or Synology SMB share. Convenient, less secure than SSH.
- NFS: Linux/Unix network filesystem. Standard in enterprise environments.
- WebDAV: HTTP-based file transfer. Less common but supported.
- AWS S3: Direct upload to an S3 bucket. Newer feature, useful for cloud-archived images.
- Clonezilla SE multicast: The killer feature for IT shops. Set up Clonezilla Server Edition on a Linux box (Ubuntu Server, ~30 minutes setup), then PXE-boot any number of client PCs from it. The server pushes one disk image via multicast UDP to all clients simultaneously. Image 30 PCs in roughly the time it takes to image one. Standard tool for school IT and corporate mass-deployment.
For a home user backing up one PC, SSH-to-NAS is the practical choice. For an IT shop, multicast SE is genuinely transformational. For Win32 Disk Imager users hoping for similar capabilities: there aren’t any. Different scope.
Can Clonezilla Do Pi SD Backups Better Than Win32 Disk Imager?
Technically yes, practically no. The capability’s there: insert your Pi SD into a USB reader, plug it into a Linux box (or a PC booted into Clonezilla Live), pick device-image mode, select the SD card as source, select an external drive or NAS as destination. Partclone reads the FAT32 boot partition and ext4 root partition, used-blocks-only, with compression. The output IMG is smaller than what Win32 Disk Imager produces, and you’ve gained encryption and SSH-target capability.
So why don’t I do it that way? Convenience math. To Clonezilla a Pi SD I’d need to:
- Save my work, close apps, reboot the desktop into Clonezilla Live USB. ~3 minutes.
- Wait for Clonezilla to boot. ~45 seconds.
- Navigate the ncurses menu maze. ~3 minutes for someone who’s done it before.
- Wait for the actual backup. ~5 minutes for a 32 GB Pi card with 4 GB used (vs Win32DI’s 12 minutes for raw read of the full 32 GB).
- Reboot back into Windows. ~1 minute.
- Total: ~13 minutes interrupted workflow.
Vs Win32 Disk Imager:
- Plug SD into USB reader on running Windows 11 24H2 desktop.
- Launch Win32 Disk Imager 1.0.0. Type filename, pick drive, click Read.
- Continue working in Windows while it runs (I usually compose emails, edit articles, the desktop’s responsive).
- ~12 minutes later it’s done. Open 7-Zip, compress to .7z. ~3 minutes.
- Total: ~15 minutes uninterrupted multitasking.
Clonezilla’s faster on the wall-clock backup itself but slower end-to-end because of the boot/reboot overhead and the inability to keep working during the backup. For Pi SDs, Win32 Disk Imager wins on convenience. The exception: if you’re already booted into Clonezilla for a PC backup, batch the SD backup at the same time and you save the boot overhead.
Real Reddit Feedback on Clonezilla in 2026
I went through r/sysadmin and r/linux threads from the past year to see what real users actually say. Aggregated through redditfavorites.com (which tracks Reddit recommendation patterns), the sentiment’s broadly positive but with consistent warnings:
- Sysadmins consistently recommend Clonezilla for “deploying identical systems or recovering machines” and praise its fast/accurate behavior. Backup or restore for typical Windows and Linux system partitions runs about 20-30 minutes, making it a strong timesaver for techs imaging multiple machines.
- The same threads include warnings that “the experience is far from friendly,” echoing what every Clonezilla user learns the first time they boot it.
- Bad-sector handling comes up: one user reported Clonezilla initially refusing to clone a drive with bad sectors, then finding the advanced-mode option to skip/ignore them. Once flipped, the clone completed successfully.
- For dead-drive recovery (where the source drive’s partially failing), some users reported around 75% success rate cloning otherwise-dying drives, often pairing Clonezilla with an external USB-to-SATA dock for the failing drive.
- The Manjaro Linux Forum thread “Clonezilla backup” (forum.manjaro.org/t/clonezilla-backup/141877) has multiple users describing successful weekly/monthly Clonezilla rotations as part of their personal backup strategy.
The Win32 Disk Imager Reddit footprint’s smaller because the tool’s scope is narrower. r/raspberry_pi threads recommend it routinely for SD card workflows, with the typical phrase being something like “use Win32 Disk Imager (Windows) or balenaEtcher (cross-platform) or dd (Linux).” Nobody recommends Clonezilla for Pi SDs in those threads, which lines up with the convenience math above.
The split’s stable: Clonezilla’s the sysadmin/Linux community’s go-to for whole-disk imaging; Win32 Disk Imager’s the maker community’s go-to for SD/USB flashing. They don’t compete.
What’s New in Clonezilla 3.3.1-35 (February 2026)?
The release notes from clonezilla.org and the SourceForge announcement give a few specific upgrades worth knowing about, since Clonezilla’s still actively developed (unlike Win32 Disk Imager):
- Linux kernel 6.18.9-1. Brings broader hardware support, including newer NVMe controllers, 13th and 14th gen Intel chipsets, AMD Zen 5, and the latest USB 3.2 Gen 2×2 controllers.
- Partclone 0.3.45. The core used-blocks engine, with improved handling of corrupted NTFS bitmaps and edge cases on heavily-fragmented ext4.
- 4kn disk conversion. The new ocs-pt-512-4k-convert utility converts 512-byte sector partition tables to 4kn (4096-byte sector) format and back. Matters when you’re migrating a consumer SSD’s image to a 4kn enterprise drive or vice versa.
- NTFS sector fixes. Improved do_ntfs_512to4k_fix and do_ntfs_4kto512_fix functions update Total Sectors at NTFS offset 40 correctly across sector-size conversions.
- BitLocker improvements. Partitions now work properly through ocs-onthefly clone-server workflow, and the system re-prompts for the password if entered incorrectly (instead of silently failing).
- LUKS master-key change. New mechanism to change the master key from a LUKS header without re-encrypting all data. Useful for security key rotation.
- Firmware list improvements. ocs-get-nic-fw-lst rewritten to retrieve firmware lists directly from Linux kernel modules, more accurate than the old hardcoded list.
- New diagnostic info files. fdisk.list and blkdev.json now saved in image directories, helpful for forensics or troubleshooting later restores.
- Debian Sid base from February 20, 2026. Latest Debian packages, security patches, current.
Compare with Win32 Disk Imager, where the most recent release is 1.0.0 from March 2017. Active vs static maintenance is a real difference. Clonezilla’s getting better year over year; Win32 Disk Imager works on what it works on and there’s no roadmap for changing that.
Where Win32 Disk Imager Still Wins: My Pi Backup Workflow
Counterpoint, because Clonezilla genuinely can’t replace Win32 DI for everything: my Home Assistant Raspberry Pi 4 has been running 24/7 since 2022. The microSD card holds the full Home Assistant OS, all my automations, my Z-Wave config, my historical sensor data. If that card dies, I’d lose four years of accumulated state. So once a month I run this:
- SSH into the Pi, run
sudo systemctl stop home-assistant, thensudo halt. - Pull power, pull the SD card, plug into a SanDisk USB 3.2 reader on my Windows 11 24H2 desktop.
- Launch Win32 Disk Imager 1.0.0. Type filename like
pi-ha-2026-04-25.img, pick the SD’s drive letter, click Read. - Wait ~12 minutes for the 32 GB Read to complete. Multitask in the meantime.
- Compress with 7-Zip LZMA2 ultra. 32 GB IMG drops to about 4.5 GB because most of the card’s empty.
- Copy the .7z to my Synology NAS in /volume1/backups/pi-ha/. Verify SHA256 matches.
- Plug the SD back into the Pi, power up, confirm Home Assistant starts. Total: ~25 minutes.
If the SD ever dies, I restore by reversing: extract .7z, write the IMG back to a fresh card with Win32 Disk Imager Write. Total recovery: ~30 minutes. I’ve actually used this twice in four years (one card developed bad sectors, one was accidentally formatted by a family member who thought it was a “spare card”). Both times the backup worked perfectly. See my SD card backup guide for the full step-by-step.
Clonezilla can do this workflow too but at the cost of rebooting my desktop into Live USB, navigating ncurses menus, and not being able to multitask during. Net loss for a routine 25-minute job done weekly. If I were doing it once a year I might use Clonezilla for the smaller image and encryption, but for high-frequency Pi SD backups, Win32 Disk Imager wins on convenience.
The Mid-Tier Tools You Should Know About
Between Win32 Disk Imager (small removable, GUI, Windows-only) and Clonezilla (full PC, ncurses, Linux Live), there’s a middle tier of GUI Windows-based tools that fill the “I want whole-PC imaging without the Linux pain” niche:
- Macrium Reflect (paid, free tier discontinued early 2024): Full Windows imaging with a GUI. Schedule incremental backups, mount images as virtual drives, restore individual files. The free tier going away has been controversial but it’s still worth the ~$70 for a perpetual license if you want polished Windows imaging.
- EaseUS Todo Backup (free tier still active in 2026): Similar GUI to Macrium. Free tier covers basic system backup. Paid version adds incrementals, encrypted backups, and centralized management.
- AOMEI Backupper Standard (free): Free Windows imaging with GUI. Less polished than Macrium but covers the basics.
- Veeam Agent for Windows (free for personal use): Enterprise-grade backup for free at the personal-use tier. Strong scheduling, incremental backups, restore to dissimilar hardware.
- Acronis True Image / Cyber Protect Home (paid): Premium tier with cloud backup, anti-ransomware, and active monitoring.
- Rescuezilla (free, GPL): The community-maintained graphical wrapper around Clonezilla. Same engine, GUI front. Great middle path.
If you want Clonezilla’s power without the menu maze, Rescuezilla’s the no-cost answer. If you want polished Windows imaging and don’t mind paying, Macrium Reflect or Acronis. Clonezilla itself stays popular because it’s free, scriptable, and the SE multicast capability genuinely has no free competitor at scale. See my top alternatives roundup for a wider look.
Limitations and Frustrations With Each
I’m not going to pretend either tool’s perfect. Honest list of pain points from years of use.
Clonezilla frustrations:
- The ncurses interface is genuinely intimidating for new users. Plan on 30-60 minutes for your first successful backup.
- If the PC loses power mid-clone, you start over. No native resume support.
- Browsing files inside a Clonezilla backup means restoring it first or mounting the partition dump with fsarchiver tooling. Not as friendly as Macrium’s “mount image as drive letter.”
- Multicast SE setup requires Linux server admin skills. Not for casual users.
- ARM Mac and ARM Windows laptops aren’t supported well. Clonezilla has experimental ARM builds but production-ready it’s x86 only.
- Some users on r/sysadmin reported the menu’s “expert mode” silently changing behavior versus beginner mode in ways that aren’t well documented.
Win32 Disk Imager frustrations:
- Hasn’t been updated since March 2017. The UI’s a Qt-style Windows dialog that looks like a 2009 utility (because it is one).
- Can’t see internal fixed drives. Period. C: is invisible.
- No compression. The IMG file’s whatever the source size is, and you need to compress separately.
- No encryption, no network targets beyond mapped drives, no scheduling, no incremental backups.
- Sometimes flagged by Defender or Norton as “potentially unwanted” because of its raw-block-write behavior, even though it’s clean. Whitelist required occasionally.
- “Read Only Allocated Partitions” is a partial workaround for the empty-space problem but doesn’t always work and is fragile across filesystem types.
Both tools work. Both have rough edges. Neither’s going away because they each occupy a stable niche that the other doesn’t address.
FAQ
Can Clonezilla read and restore Win32 Disk Imager IMG files?
Indirectly. Clonezilla’s image format is its own structure (a directory tree of partition dumps and metadata, not a single IMG file). To restore a Win32 Disk Imager IMG via Clonezilla, you’d write the IMG to a drive first using dd in Clonezilla’s shell, which is awkward. Easier path: keep Win32 Disk Imager around for restoring its own IMG files. The tools don’t share a format.
Does Clonezilla back up only used space or the whole drive?
By default, only used blocks via Partclone, for supported filesystems (NTFS, ext4, XFS, FAT32, exFAT, ReiserFS, JFS, HFS+, BTRFS). For unsupported or corrupted filesystems, Clonezilla falls back to dd-style raw cloning of the whole partition. You can force raw mode with the -q1 flag in expert settings. Win32 Disk Imager’s always whole-drive raw.
Can I browse files inside a Clonezilla backup?
Indirectly. Clonezilla stores backups as Partclone-compressed filesystem dumps, not browsable IMG files. To access individual files, restore the partition to a spare drive first, or use fsarchiver / Partclone tools on Linux to extract specific data. Macrium Reflect’s “mount image as drive letter” feature is more convenient if file-level browsing matters to you.
Is Clonezilla genuinely free?
Fully free, GPL v2. Both Clonezilla Live and Clonezilla SE (server edition) are free. The Taiwan NCHC team that develops it offers commercial support contracts but the software itself doesn’t have a paid tier. Also worth noting: it’s funded by the Taiwanese government’s NCHC, which means it’s likely to keep getting updates regardless of commercial pressures.
Can Clonezilla restore a backup to a different-size drive?
Yes for same-or-larger destinations. Restore to a smaller drive requires the source’s used data to physically fit on the destination. Clonezilla 3.3.1-35’s improved partition-table tools (ocs-expand-gpt-pt rewritten in this release) handle resize-to-fit better than older versions.
How does Clonezilla handle BitLocker-encrypted drives in 2026?
Better than older versions. Clonezilla 3.3.1-35 specifically improved BitLocker support: BitLocker partitions now work through the ocs-onthefly clone-server workflow, and if you enter the password incorrectly, it re-prompts instead of silently failing. Restoring to identical hardware works directly; restoring to different hardware may require BitLocker key re-entry on first boot. Win32 Disk Imager has zero BitLocker awareness.
Can I run Clonezilla on Mac or ARM PCs?
Clonezilla Live boots on any x86 / x86_64 PC. ARM Macs (M1/M2/M3/M4) and ARM Windows laptops aren’t natively supported in production. There are experimental ARM builds at clonezilla.org/downloads but they’re not the recommended path. For ARM-native cloning, look at Asahi Linux’s tools (Mac ARM) or vendor-specific options.
Do I need networking to use Clonezilla?
No for local backups (disk-to-disk or disk-to-image-on-USB). Yes for network destinations (SSH, SMB, NFS, S3) and required for SE multicast deployment. The 3.3.1-35 release added improved firmware-list retrieval directly from kernel modules, helping with NIC compatibility on newer hardware.
Can Win32 Disk Imager be a Clonezilla replacement for tech-averse users?
Only for small removable media. For full-PC backup with a friendly GUI, the better answer’s Macrium Reflect, EaseUS Todo Backup, AOMEI Backupper, or Rescuezilla (graphical Clonezilla wrapper). Win32 Disk Imager and “full PC backup with GUI” don’t intersect.
How do I learn Clonezilla without risking real data?
Practice in a VM. VirtualBox or VMware Workstation with a small test VM (8-16 GB virtual disk) plus a second virtual disk as backup target. Boot Clonezilla Live ISO inside the VM, run through the menus, do a backup, restore it. No risk to your real PC. The Veronica Explains Clonezilla 101 walkthrough at vkc.sh is a good first read.
What happens to my running Windows during a Clonezilla clone?
Windows is offline for the duration. You boot the PC into Clonezilla Live USB, which runs Linux instead of Windows. Windows starts again the next time you boot from the internal drive. This offline-clone approach is actually a strength because it avoids file-locking issues that can cause inconsistent backups in live-Windows tools.
Is Clonezilla useful for scheduled or automated backups?
Not directly in Clonezilla Live. The Live version’s interactive. For scheduled automated runs, you’ve got two options: Clonezilla SE (server edition) with cron-driven jobs on a Linux server, or a Windows-side tool like Macrium Reflect, Veeam, or EaseUS that has built-in scheduling. For a single home PC, scheduled imaging via Macrium’s typically the easier answer.
Should I have both Win32 Disk Imager and Clonezilla installed?
Yes if you do both small-removable-media work and whole-PC backup. They don’t conflict, take minimal disk space (12 MB Win32DI installer plus a 360 MB Clonezilla USB stick), and cover totally different needs. My standard imaging-PC setup includes Win32 Disk Imager 1.0.0, a Clonezilla Live 3.3.1-35 USB on my desk, plus Rufus 4.6 and Ventoy 1.1.12 for bootable USB workflows. Each tool’s better at something the others can’t do.
What’s the latest Clonezilla version in 2026?
As of this writing in April 2026, the latest stable’s Clonezilla Live 3.3.1-35, released February 20, 2026. It’s based on Debian Sid from that date, ships with Linux kernel 6.18.9-1, includes Partclone 0.3.45, and adds 4kn disk conversion, improved BitLocker handling, LUKS master-key change support, and rewritten firmware-list retrieval. Always download from the official clonezilla.org or the SourceForge mirror.
Bottom Line
Win32 Disk Imager and Clonezilla aren’t competitors. They occupy different parts of the disk-imaging space: Win32 Disk Imager for small removable media (SD cards, USB sticks) where a one-click Windows GUI is the right tool, and Clonezilla for whole-PC imaging at scale where used-block compression, encryption, network targets, and multicast deployment matter. Most serious maker and IT workflows benefit from having both tools available.
If you’re picking one because you only have time to learn one: pick based on what you actually need to back up. Pi SD cards, USB sticks, removable media? Win32 Disk Imager. Internal SSDs, full Windows installs, server room deployment? Clonezilla (or Rescuezilla if the ncurses menus scare you). Both? Get both. They’re free, tiny, and don’t conflict.
For the broader Win32 Disk Imager comparison context, here’s where I’d point you next: my complete Win32 Disk Imager guide (the pillar article), vs Rufus if you’re picking the most popular ISO writer, vs balenaEtcher for the cross-platform alternative, vs Raspberry Pi Imager for Pi-specific workflows, vs Ventoy for multiboot USBs, the top 10 alternatives roundup, the SD card backup workflow, and the best free SD card imaging tools ranked review.