
You have a 128 GB SD card with a working Raspberry Pi install on it. You want to migrate to a smaller, cheaper, or more rugged 32 GB card. Logically it should work: the Pi OS probably uses maybe 8 GB, there’s plenty of room on the 32 GB destination. Practically, Win32 Disk Imager refuses. “Not enough space on disk.” Because Win32 Disk Imager tries to copy 128 GB of source (including mostly-empty space) to a 32 GB destination. It doesn’t fit, even though the actual data would.
The fix is to shrink the source image before writing. Win32 Disk Imager doesn’t know which bytes are “used” vs “empty,” so it can’t do this automatically. You have to reduce the IMG using PiShrink (Pi images) or manual filesystem resize (others). Once the IMG is smaller than the destination card, Win32 Disk Imager writes it fine, and the Pi auto-expands on first boot to use whatever space the smaller card has. This article is the full workflow, including the edge cases where it doesn’t quite work.
TL;DR: Win32 Disk Imager Read the larger source with “Read Only Allocated Partitions” → run PiShrink on the IMG to reduce it below the destination size → Win32 Disk Imager Write the shrunk IMG to the smaller destination → Pi boots and auto-expands. Five steps. 30-60 minutes total.
Why This Doesn’t “Just Work”
The fundamental issue is how disk imaging works. An IMG is a byte-for-byte copy. Win32 Disk Imager reads the source drive sector by sector and writes to the destination.
If the source is 128 GB and destination is 32 GB, Win32 Disk Imager gets 32 GB into the operation before hitting the end of the destination. At that point, it either errors out or produces a truncated, unbootable card. Neither is useful.
The data on the source is smaller than 32 GB, but Win32 Disk Imager doesn’t know that. It just sees 128 GB of sectors.
Solution: shrink the IMG so it’s smaller than the destination. Two-step process: Read full IMG, shrink IMG, then Write.
Prerequisites
- Source SD card (the larger one, 64 GB / 128 GB / 256 GB).
- Destination SD card (the smaller one, 16 GB / 32 GB / 64 GB). Must be larger than the actual data on the source.
- USB SD card reader (or two, if you want to do both at once).
- Windows PC with Win32 Disk Imager.
- WSL installed (for PiShrink). See our PiShrink guide.
- Enough free disk space for the source IMG: at least the source card’s size. 128 GB card = 128 GB free on C: or D:.
- 60-90 minutes total time.
Step 1: Read the Source Card
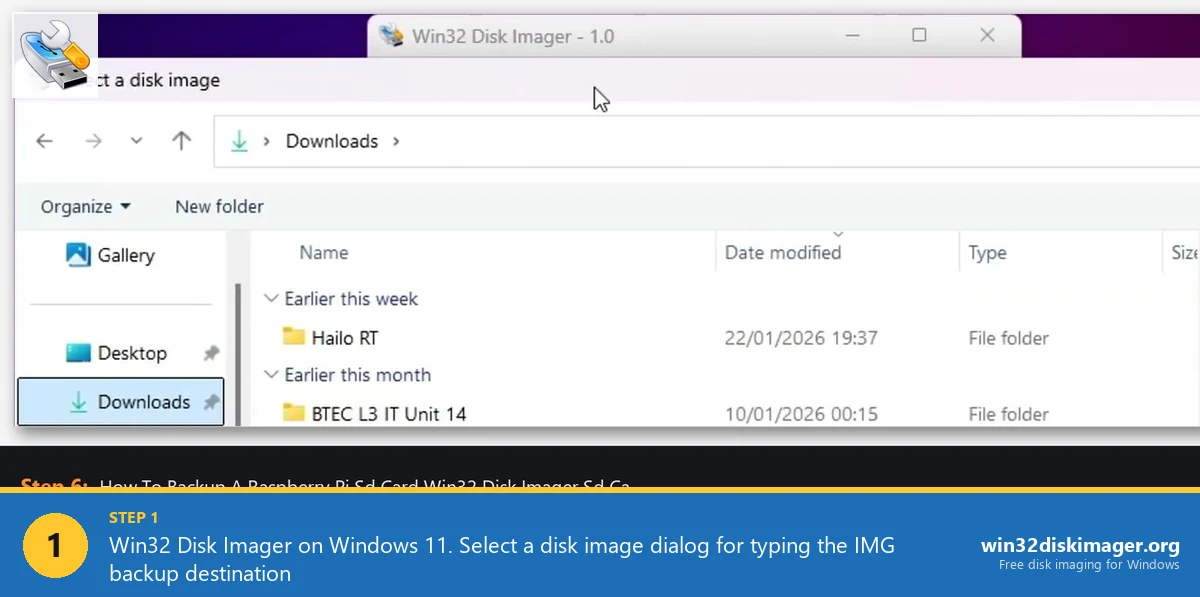
Plug source card into Windows PC. Launch Win32 Disk Imager as admin.
- Click folder icon, specify output path (e.g.,
D:\temp\source.img). - Select source card in Device dropdown.
- Tick “Read Only Allocated Partitions.” This reduces the IMG size from 128 GB to maybe 30-60 GB depending on how the partition is sized.
- Click Read. Wait 20-40 minutes depending on card speed.
Result: a .img file, still larger than destination card probably. Next step shrinks further.
Detailed Read walkthrough in our SD backup guide.
Step 2: Run PiShrink
The critical step. PiShrink resizes the partition inside the IMG to minimum needed.
Open WSL. Run:
sudo pishrink /mnt/d/temp/source.imgAfter 1-3 minutes, PiShrink reports the new shrunk size. Typically 3-10 GB for a typical Pi OS install.
Verify the shrunk IMG is smaller than your destination card:
ls -lh /mnt/d/temp/source.imgIf the shrunk IMG is still larger than your destination, either your Pi has more data than fits, or you need a bigger destination. PiShrink won’t magically make a 50 GB data set fit on a 32 GB card; you need the data itself to fit.
See our PiShrink guide for full setup.
Step 3: Write the Shrunk IMG to Destination
Unplug source card, insert destination card.
In Win32 Disk Imager:
- Point Image File at the shrunk IMG.
- Select destination card in Device dropdown (triple-check, don’t overwrite source).
- Click Write. Confirm. Wait 5-15 minutes.
After Write Success: verify with Verify Only.
Eject destination card. Insert into Pi.
Step 4: Boot the Pi and Auto-Expand
Power on the Pi with the new (smaller) card. First boot:
- Pi shows raspberry splash.
- PiShrink’s auto-expand script runs, resizing the partition to fill the new card.
- Takes 30-60 seconds depending on card speed.
- Pi reboots automatically.
- Second boot: Pi OS loads normally with the partition now using the full smaller card.
SSH in and verify: df -h shows rootfs using most of the new card.
Home Assistant, OctoPrint, whatever was running before is now running from the smaller card. Your data and configs are preserved exactly.
Check: Did Auto-Expand Happen?
Sometimes auto-expand doesn’t run. Causes:
- PiShrink’s expand script got overwritten by later Pi OS updates.
- rc.local was customized, conflicting with auto-expand.
- Card doesn’t have enough space for expansion (rare).
Manual expand if needed:
sudo raspi-config
# Advanced Options → A1 Expand Filesystem → Finish → Reboot
Takes ~60 seconds. After reboot, partition uses full card. Same result as auto-expand.
What If PiShrink Isn’t an Option?
PiShrink only works on Pi OS images (ext4 root). For Windows images, non-Pi Linux (Ubuntu, Manjaro), or custom embedded firmware: manual filesystem resize.
Linux/WSL procedure:
# Loop-mount the IMG
sudo losetup -P /dev/loop99 source.img

# Check what's in there
sudo fdisk -l /dev/loop99

# For ext4 root partition, say /dev/loop99p2:
sudo e2fsck -f /dev/loop99p2
sudo resize2fs -M /dev/loop99p2  # shrink to minimum
# Note the new size, say 6144000 blocks

# Shrink the partition in the table
sudo parted /dev/loop99 resizepart 2 10G

# Truncate the IMG file
truncate --size=10G source.img

# Detach
sudo losetup -d /dev/loop99
Works for ext4. For NTFS, use ntfsresize instead of resize2fs. For FAT32, less straightforward; may need to delete-and-recreate partition.
Complex but universal. PiShrink automates this for Pi OS, so use it when possible.
Edge Case: Data Too Large for Destination
Obvious limit: if your Pi’s actual data is 40 GB, you can’t fit it on a 32 GB card. PiShrink doesn’t magic data into nothing.
Options:
- Clean up the source before imaging. Delete caches, old logs, unused Docker images.
- Move some data off the Pi (to USB SSD, NAS) before imaging.
- Upgrade the destination to a larger card.
For Home Assistant users: the recorder database can be huge. Prune old history before imaging to reduce size.
Edge Case: Multiple Partitions Beyond Root
Standard Pi OS has 2 partitions (boot + root). PiShrink handles this.
Some setups add swap partitions, data partitions, or reserved space. PiShrink may not handle them optimally. Check the shrunk IMG with fdisk -l before Writing.
If the shrunk IMG is still too large because a non-root partition is taking space, manually delete or shrink that partition before running PiShrink.
Edge Case: Encrypted Partitions
LUKS-encrypted Pi setups can’t be shrunk by PiShrink directly. The encryption layer needs to be resized first, which requires decryption.
Procedure: boot the Pi, unlock LUKS, decrypt root partition, e2fsck, resize2fs, re-encrypt, verify. Complex. For most users: avoid shrinking encrypted Pi setups. Upgrade to larger destination card instead.
Speed Expectations
Total time for a typical workflow (128 GB → 32 GB):
- Read source card (128 GB full or ~40 GB with Allocated Partitions): 20-40 minutes.
- PiShrink: 1-3 minutes.
- Write shrunk IMG to 32 GB card: 10-15 minutes.
- Boot Pi and auto-expand: 2-3 minutes.
Total: 35-65 minutes. Acceptable for a one-time migration.
To reduce Read time: skip Allocated Partitions (read only the data-size with Read with Allocated Partitions when partition is small). On a Pi 4 USB 3 SSD source, Read is faster than on a SD.
Alternative: SD Card Copier On the Pi
Pi OS has a built-in GUI tool called “SD Card Copier” that handles this workflow on the Pi itself. Some users find this easier than PC-based workflow.
- Plug source card into Pi (via USB SD reader).
- Insert destination card into Pi’s built-in SD slot.
- Launch Accessories → SD Card Copier.
- Pick source = USB reader, destination = SD slot.
- Click Start. SD Card Copier clones intelligently (doesn’t copy empty blocks).
Advantages: handles shrinking automatically, no Win32 Disk Imager or PiShrink needed.
Disadvantages: Pi must be running during the clone (can’t use it). Requires Pi to have desktop environment (Lite doesn’t). Requires two readers if source is SD.
Useful when you have a working Pi with desktop and want to clone without PC workflow.
Alternative: Direct dd with Partition Shrink
Advanced Linux workflow (skipping Win32 Disk Imager):
- Connect both cards via USB readers to a Linux PC.
- Boot to Linux Live USB or WSL with two readers plugged in.
- Manually shrink the source card’s partition first with gparted (doesn’t need IMG intermediate).
sudo dd if=/dev/sdX of=/dev/sdY bs=4M status=progresswhere X is source, Y is destination.- Expand destination card’s partition with gparted after.
Bypasses IMG intermediate. Faster, less disk space needed. Requires Linux comfort.
For most Windows users: stick with Win32 Disk Imager + PiShrink workflow.
Real Example: Migrating OctoPrint Pi
My OctoPrint Pi was on a 128 GB card I wanted to repurpose. Pi OS + OctoPrint + ~30 GB of G-code history. Destination: spare 32 GB SD card.
Workflow:
- Cleared OctoPrint history older than 90 days via web UI. Data down to ~6 GB.
- Shut down Pi cleanly.
- Pulled 128 GB card, plugged into USB reader on Windows PC.
- Win32 Disk Imager Read with Allocated Partitions → 30 min → ~100 GB IMG (partition was auto-expanded).
- WSL:
sudo pishrink /mnt/d/temp/octopi.img→ 2 min → ~7 GB shrunk IMG. - Swapped source SD out of reader, inserted 32 GB destination.
- Win32 Disk Imager Write → 12 min.
- Verified with Verify Only.
- Inserted into Pi, powered on. Auto-expand ran, 90 sec. Reboot.
- OctoPrint back up, full history (of the last 90 days), running from 32 GB card now instead of 128 GB.
Total: 50 minutes. Reclaimed the 128 GB card for other projects.
Frequent Mistakes
Skipping “Read Only Allocated Partitions”: results in 128 GB source IMG that’s difficult to work with. Always tick this for this workflow.
Forgetting to run PiShrink: IMG is still bigger than destination. Write fails.
Running PiShrink on the source card directly: PiShrink works on IMG files, not on mounted cards. Must Read to IMG first.
Skipping verification after Write: if the Write was incomplete due to source IMG size, the destination card boots partway then fails. Verify Only catches this immediately.
Trying to use Windows-formatted cards as source: PiShrink only handles Pi OS ext4 images. Windows NTFS sources need different workflow.
Industrial/High-Endurance Migration Scenario
Common use case: moving from consumer SD to industrial-grade smaller card.
Setup: you’ve been running a Pi project on a 128 GB SanDisk Ultra, but it fails after 18 months of 24/7 use. You want to switch to a 32 GB SanDisk High Endurance (better endurance despite being smaller).
Workflow is identical to this article’s. Key difference: confirm the destination card is reliable industrial-grade (SanDisk High Endurance, Samsung PRO Endurance, Kingston High Performance). Don’t downgrade to slower/cheaper 32 GB card; the point is more endurance, not smaller capacity for its own sake.
High Endurance cards are tested for 2000-5000 write cycles vs 500-1000 for consumer cards. For 24/7 Pi workloads, the durability gain is worth the cost.
Reverse Direction: Smaller to Larger
The opposite workflow (32 GB source, 128 GB destination) is trivial. Just Read the smaller card to IMG, Write the IMG to the larger card. Pi auto-expands on boot to fill the larger card.
See our restore Pi SD guide. No shrinking needed.
When Migration Is a Bad Idea
Be honest: migrating to a smaller card isn’t always wise. Reasons to reconsider:
- Future growth: your Pi’s data will grow. Home Assistant history, log files, Docker images. Migrating to tight fit means re-migrating in 6 months.
- Replacement cost: a new 128 GB card costs $15. A 32 GB card costs $8. Saving $7 for an hour of migration work is barely worth it.
- Reliability tradeoff: smaller cards often have less endurance. If your current setup is working, don’t introduce new failure points.
- Migration risks: anything can go wrong during a migration. Current card is proven working; new card is unknown.
Good reasons to migrate:
- Redeploy the bigger card. You have a better use for the 128 GB card elsewhere (video recording, large local storage).
- Cost constraint for fleet deployment. Deploying 10 Pi devices, each can use a 32 GB card, budget reasons.
- Physical size/endurance change. Moving from standard to microSD, or to industrial-grade smaller card.
Make the call based on specific needs, not just “smaller is better.”
FAQ
Can Win32 Disk Imager automatically shrink the source during Read?
No. Win32 Disk Imager does raw byte-for-byte copying, no filesystem awareness. PiShrink is a separate post-processing step.
How much smaller can the destination be?
As small as the actual data + 10-20% filesystem overhead. If your Pi has 6 GB of actual files, a destination card of 8 GB is minimum viable. 10 GB for comfort.
Does this work for Windows installer USBs?
Not typically. Windows installer ISOs are already sized to fit minimum requirements. They don’t have the unused-space problem Pi cards have.
Will my Pi OS license / activation transfer?
Pi OS is free and has no activation. Software activations for apps (e.g., some commercial Linux software) may or may not transfer depending on licensing model. Most FOSS software: fine. Commercial: check per-app.
Can I do this with a corrupted source card?
Depends on how corrupted. Minor filesystem errors: recover with CHKDSK first, then Read + PiShrink normally. Severe corruption: use dd with conv=noerror,sync to salvage what’s readable, then try PiShrink. See our corrupt SD guide.
Does the destination SD card need to be new/blank?
No. Win32 Disk Imager Write overwrites the destination entirely. Existing data is lost but that’s expected.
Can I use a USB SSD as destination instead of SD card?
Yes. Pi 4/5 support USB boot. Flash the shrunk IMG to USB SSD, configure Pi for USB boot, power on. SSD is much faster and longer-lasting than SD.
What if auto-expand takes forever on the destination?
Normal auto-expand is 30-60 seconds. If it takes 5+ minutes, something is wrong. Check Pi’s SD card LED: solid on = active resize, blinking = possibly stuck. Try reboot after a wait. If persistent, manually raspi-config → Expand Filesystem.
How do I verify the migration worked completely?
After boot: df -h confirms partition size. Run your usual apps (Home Assistant, OctoPrint, etc.), verify all configurations loaded correctly. Compare ls /etc against source Pi’s etc. If matches, migration is complete.
Do I need to keep the source card after migration?
Good practice: keep the source card as backup for at least a week until you’re confident the migrated setup is working. Then repurpose.
Can I migrate between cards of different speed classes?
Yes. Pi doesn’t care about card class for data operations. But note: slower destination = slower Pi performance overall. If migrating to a cheaper/slower card, expect slightly worse real-world performance.
Does this work for BitLocker-encrypted USBs?
No. BitLocker requires the drive to be unlocked for raw reads. Disable BitLocker on the source before attempting this migration.
Does Win32 Disk Imager have a shrinking feature built-in?
No. “Read Only Allocated Partitions” is the closest, but it doesn’t shrink filesystems inside the partition. External tools (PiShrink, manual resize2fs) are required for true shrinking.
Wrapping Up
Migrating from larger to smaller SD card is a common need that Win32 Disk Imager doesn’t do natively, but the Win32 Disk Imager + PiShrink combination handles it cleanly. Read → Shrink → Write → auto-expand. 60 minutes end-to-end. For the supporting workflows see SD backup, Pi restore, PiShrink guide, and why backups are larger than data.
Related Guides
Pair this guide with the rest of the Win32 Disk Imager knowledge base. These cover the adjacent workflows you’ll hit when working with disk images, bootable USBs, and Windows partition management.
- How to Back Up an SD Card to an IMG File on Windows — Back up a Raspberry Pi SD card to an IMG file on Windows — full Read walkthrough, PiShrink compression, and a backup-schedule template.
- How to Restore a Raspberry Pi SD Card from a Backup IMG — Restore your Pi SD card from an IMG backup with Win32 Disk Imager. Auto-expand filesystem, larger-card upgrades, post-restore troubleshooting.
- How to Shrink an IMG File After Backup with PiShrink (2026) — Shrink Pi backup IMGs by 30-70% with PiShrink + WSL — auto-expand on first boot, real 14x storage savings example, automation script.
- Why Win32 Disk Imager Backups Are Larger Than Used Space — Why IMG backups exceed data size — Full Read vs Allocated Partitions vs PiShrink vs compression. Real storage/cloud math for multi-Pi archives.