Win32 Disk Imager is the simplest free tool for writing .img and .iso files to USB drives and SD cards on Windows — and for backing those drives up into a single image file. This guide walks you through every step on Windows 10 and Windows 11 (tested April 2026), with real screenshots, the safety checks most tutorials skip, and fixes for the errors you’re most likely to hit.
.img file → select the correct removable drive letter → click Write (to flash) or Read (to back up). Always double-check the drive letter before clicking Write.
What Is Win32 Disk Imager?
Win32 Disk Imager is an open-source Windows utility that performs raw, sector-by-sector reads and writes between disk image files (.img, .iso, .bin) and removable storage devices (USB flash drives, SD cards, microSD cards). Unlike file-copy tools, it preserves the entire partition structure and boot sectors, which is why it remains the standard tool for flashing Raspberry Pi OS, OpenWrt, RetroPie, IPFire, pfSense images, and dozens of other appliance distributions.
Two things make it different from newer tools like balenaEtcher or Rufus:
- It can read as well as write. Most modern flashers only write images to a drive. Win32 Disk Imager can also read the entire contents of an SD card or USB drive back into an image file — the standard way to back up a working Raspberry Pi card.
- It only shows removable drives. The interface deliberately hides your internal Windows disk, so it is much harder to overwrite your system drive by accident.
Before You Start: What You Need
- A Windows 10 or Windows 11 PC (32-bit and 64-bit are both supported).
- The latest Win32 Disk Imager installer from win32diskimager.org/download.
- A USB flash drive or SD card large enough for your image. Anything on it will be permanently erased.
- The
.imgor.isofile you want to flash (or an empty folder to save a backup into). - An SD-card reader or USB port. Built-in laptop card slots usually work, but a USB-3 reader is faster.
Step 1 — Install and Launch Win32 Disk Imager
Run the installer from the official site, accept the defaults, and let it finish. The first thing to do after installation is right-click the Win32 Disk Imager shortcut and choose “Run as administrator.” Raw disk writing is an administrator-level operation in Windows; if you skip this, you’ll almost certainly hit “Error 5: Access is denied” the moment you click Write.
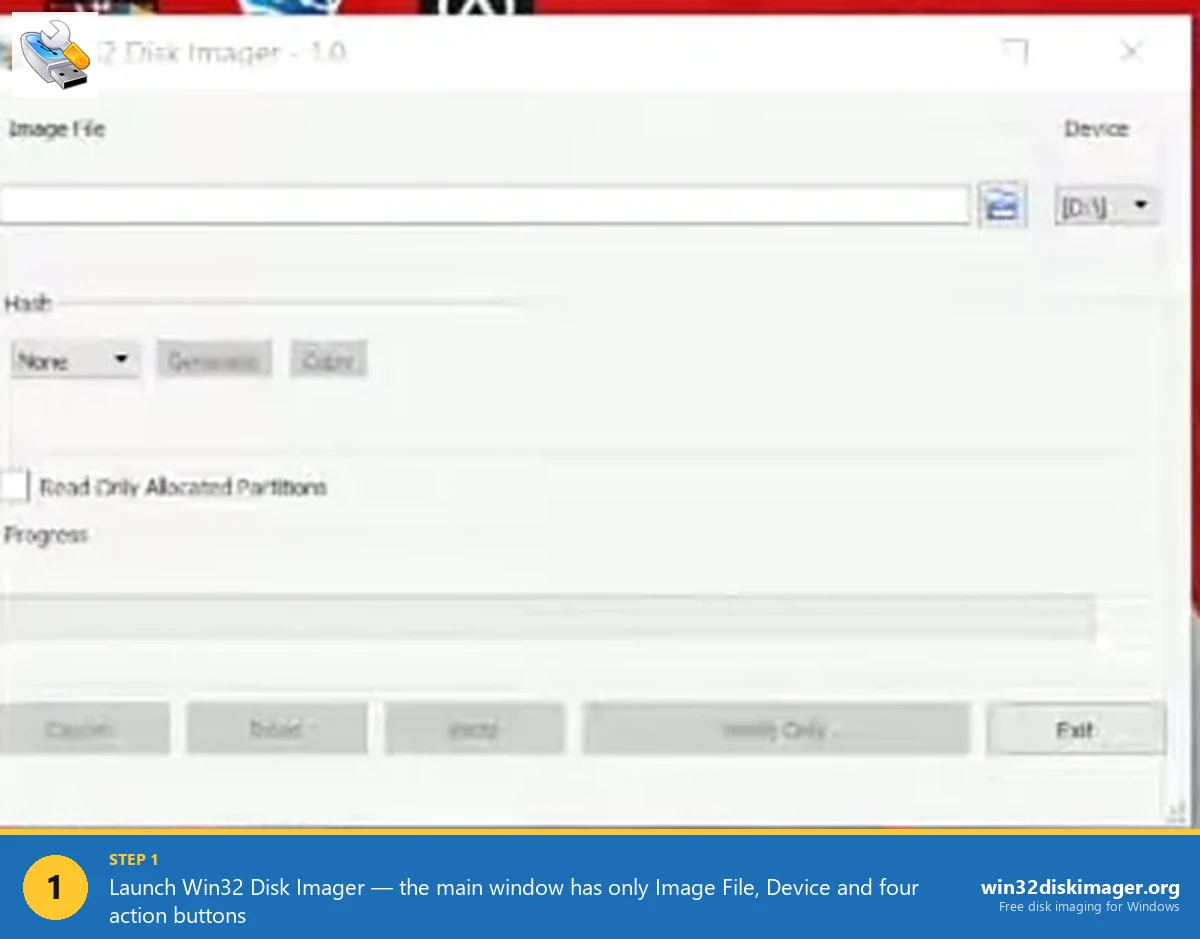
When the program opens, the interface is intentionally minimal: an Image File field on the left, a Device drop-down on the right, and the four action buttons (Read, Write, Verify Only, Exit) along the bottom.
Step 2 — Insert and Identify Your Target Drive
Plug in the USB drive or SD card you plan to write to (or read from). Open File Explorer and confirm the assigned drive letter — for example, D:, F:, or G:. This is the single most important check in the entire process. Win32 Disk Imager will overwrite everything on the drive letter you select, with no recovery option after you click Write.
Two safety habits that prevent disasters:
- Disconnect every other USB drive and external SSD before you flash. The fewer removable drives in the list, the lower the chance of clicking the wrong one.
- Note the size shown in File Explorer (for example “USB Drive (D:) 14.5 GB”). When you open the Device drop-down in Win32 Disk Imager, the listed capacity should match.
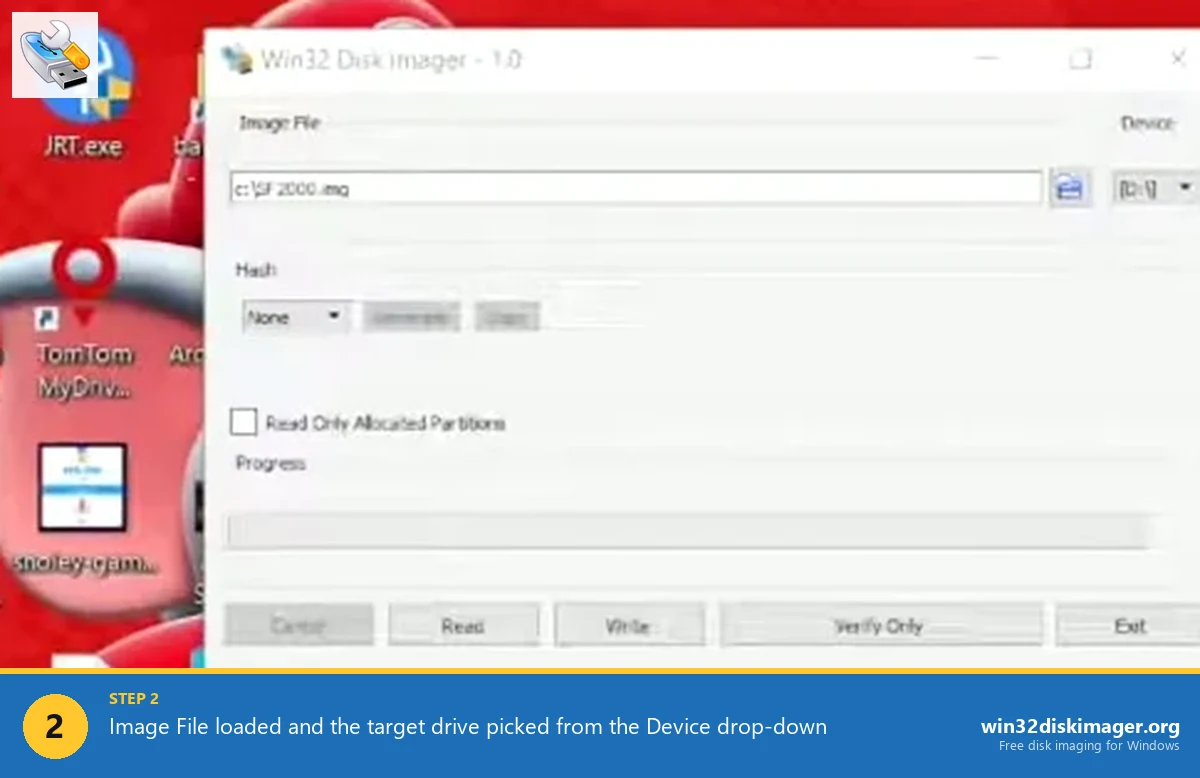
Step 3 — Select Your Image File and Drive
Click the small blue folder icon to the right of the Image File field and browse to your .img file. By default the file dialog only shows .img and .IMG files; if you need to flash an .iso file, change the file-type filter at the bottom of the dialog to *.* and pick the ISO directly. ISO files written this way work for any image that contains a complete boot structure (Raspberry Pi OS, IPFire, OpenWrt, most Linux installers).
Next, open the Device drop-down at the top right and choose the drive letter you just confirmed. Leave Hash set to “None” for now — you can verify integrity afterwards in a separate step.
Step 4 — Click Write to Flash the Image
With both fields set, click Write. A confirmation dialog appears asking if you really want to overwrite the device — read the drive letter one final time, then click Yes. Progress is shown by the bar at the bottom and a percentage in the title bar.
How long this takes depends almost entirely on your card or USB drive’s write speed, not on the speed of Win32 Disk Imager itself:
- Fast NVMe-class USB-3 stick: a 4 GB Raspberry Pi OS image in roughly 90 seconds.
- Standard Class 10 microSD: the same image in 4 to 8 minutes.
- Old USB-2 stick: 15 minutes or more.
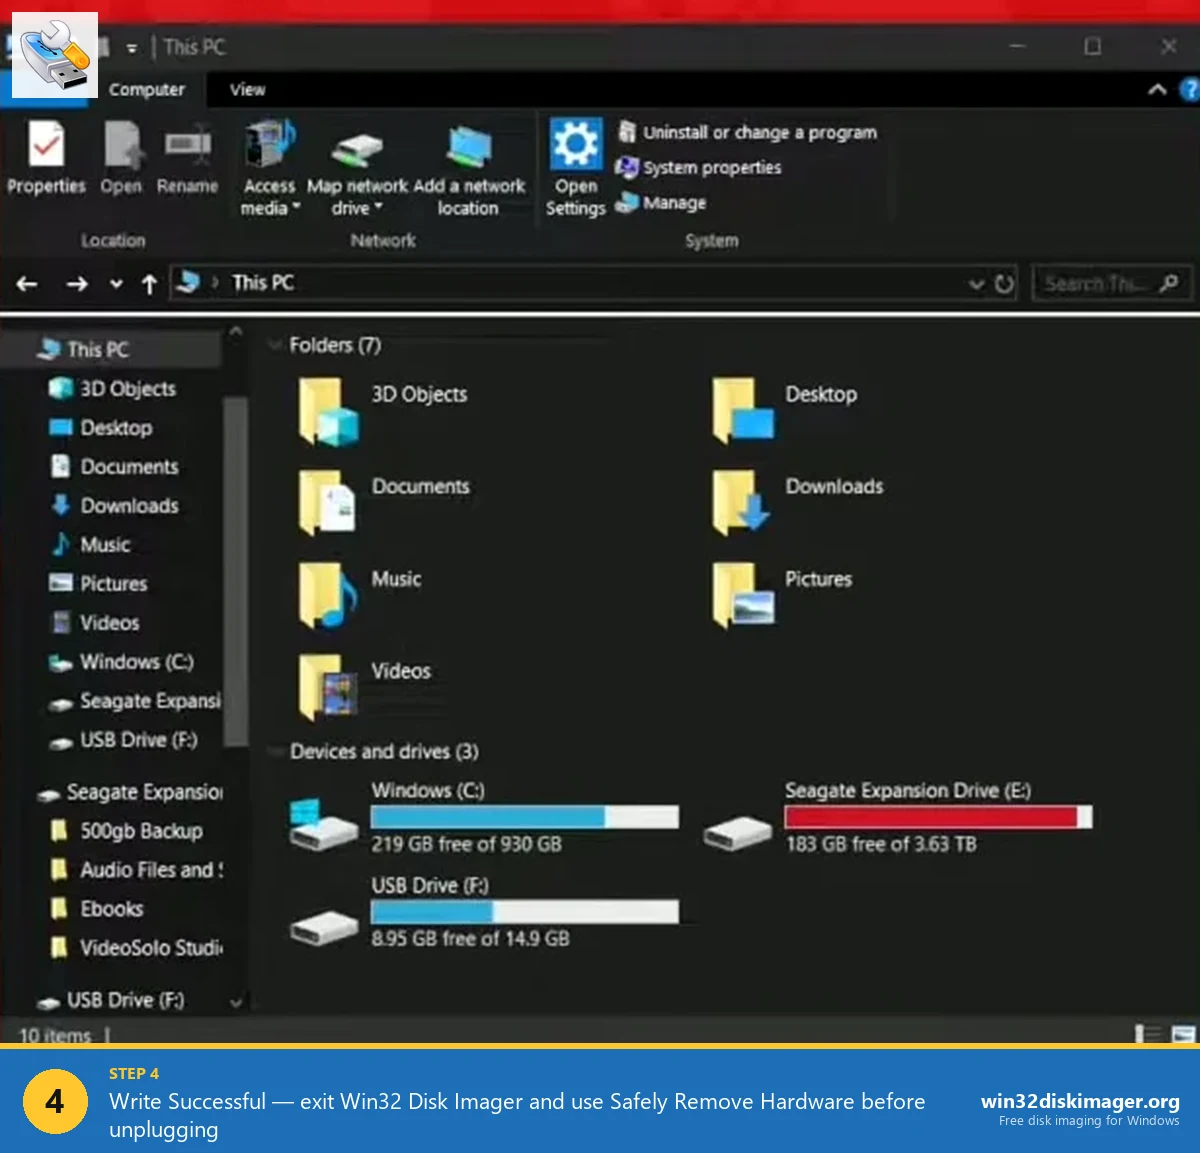
When the write completes, you’ll see a “Write Successful” message. Do not unplug the drive yet. Click Exit first, then safely eject from the system tray. Yanking the drive while Windows is still flushing its write cache is a common cause of “the SD card boots once and then dies.”
Step 5 — How to Back Up an SD Card or USB Drive (Read)
Backing up works in reverse. With your card or drive plugged in:
- In the Image File field, type a new filename ending in
.img— for exampleC:\Backups\rpi-2026-04-18.img. The folder must already exist. - Pick the source drive in the Device drop-down.
- Click Read.
Win32 Disk Imager will copy the entire card byte-for-byte into a single .img file. Be aware: the resulting image is the full physical size of the card, not the used space. A 32 GB SD card that contains 4 GB of data still produces a 32 GB .img file. To shrink it, run the resulting image through PiShrink on a Linux machine or inside WSL.
How to Verify Your Image Actually Wrote Correctly
After a write, click Verify Only with the same image and device still selected. Win32 Disk Imager re-reads the device and compares it byte-by-byte with the source .img file. If you see “Verification Successful,” the flash is genuinely usable; if it reports a mismatch, the SD card or USB drive is failing — replace it before relying on it.
For an even stronger guarantee, set Hash to SHA1 or MD5 before clicking Write. The hash is computed from the source image; you can compare it against the published hash on the operating system download page (Raspberry Pi OS, OpenWrt, and pfSense all publish SHA-256 sums on their download pages).
Common Errors and How to Fix Them
“Error 5: Access is denied”
By far the most common error. Three fixes, in order of likelihood:
- Close the program, right-click its shortcut, and choose Run as administrator.
- Close every File Explorer window that has the target drive open.
- Pause OneDrive, Google Drive, Dropbox, and any antivirus that does “Active Protection” on removable media (Acronis is a known offender).
“An error occurred when attempting to write data to handle”
Almost always a write-protected SD card. Slide the small lock switch on the side of the full-size SD adapter to the unlocked position, then re-insert.
Win32 Disk Imager opens and immediately closes (no GUI)
Caused by a conflict with mounted virtual drives. Unmount any VeraCrypt volumes, dismount Daemon Tools images, and try again. If the problem persists, install the most recent build from the official download page rather than the version bundled with older Raspberry Pi tutorials.
“Not enough space on disk”
Means the destination is physically smaller than the source image. A backup taken from a 32 GB card cannot be restored to a 16 GB card, even if only 4 GB was used. Either use a same-size-or-larger card, or shrink the source image with PiShrink first.
Win32 Disk Imager vs Rufus, Etcher, and Raspberry Pi Imager
Each tool has a sweet spot:
- Win32 Disk Imager — best when you also need to back up a card to an image file, or when you are restoring an existing
.imgbackup. Smaller and faster to launch than the alternatives. - Rufus — best for creating bootable Windows installers, BIOS-update sticks, and ISO files larger than 4 GB on UEFI hardware. Cannot back up.
- balenaEtcher — best for absolute beginners; the cleanest interface and accepts compressed
.zipimages directly. Cannot back up. - Raspberry Pi Imager — best for first-time Raspberry Pi users who don’t already have an image file; downloads the OS for you and pre-configures Wi-Fi, SSH, and locale before flashing.
Frequently Asked Questions
Is Win32 Disk Imager safe to use in 2026?
Yes. The project is open-source and hosted on SourceForge with the source code available for inspection. The Windows 11 build is signed, and the installer does not bundle adware or toolbars when downloaded from the official site.
Does Win32 Disk Imager work on Windows 11?
Yes — version 1.0.0 and later runs on Windows 11 23H2 and 24H2. If you see the program crash on launch, it is almost always due to a third-party shell extension (OneDrive, VeraCrypt, Daemon Tools), not Windows 11 itself.
Can Win32 Disk Imager write ISO files, or only IMG?
Both. In the file picker, change the filter from “Disk Images (*.img, *.IMG)” to “*.*” and select your ISO. Raw, bootable ISOs flash correctly; hybrid Windows installer ISOs are better handled by Rufus.
Why is my SD card showing the wrong size after I used Win32 Disk Imager?
Because the image you wrote was smaller than the card, Windows only sees the partition the image created. To recover the full capacity, open Disk Management, delete every partition on the card, then create a new one — or simply re-format with the official SD Card Formatter tool.
Can I use Win32 Disk Imager to clone one SD card to another?
Yes, in two steps: Read the source card to an .img file, swap in the destination card of equal or larger size, then Write the same image back. Direct card-to-card cloning isn’t supported in a single operation.
You’re Done
That’s the entire workflow — install, run as administrator, pick your image, pick the drive, write, verify. Once the muscle memory is there, you can flash a fresh Raspberry Pi OS card or back up a working setup in under five minutes.
Next: if you specifically work with Raspberry Pi, read our follow-up guide on How to Back Up a Raspberry Pi SD Card to an IMG File on Windows. For users who keep hitting permission errors, jump to Win32 Disk Imager Error 5: Access Is Denied — 7 Working Fixes.
Related Guides
Pair this guide with the rest of the Win32 Disk Imager knowledge base. These cover the adjacent workflows you’ll hit when working with disk images, bootable USBs, and Windows partition management.
- Write an IMG File to USB with Win32 Disk Imager — Step-by-step for writing a .img or .iso to USB on Windows 10/11 with real benchmarks and error fixes.
- Create a Windows 11 Recovery Drive (USB) — Modern Win 10/11 replacement for the old System Repair Disc. Reinstalls Windows from a single USB when the boot drive dies.
- Shrink a Windows 11 Volume in Disk Management — Reclaim unallocated space from a partition for a dual-boot, game drive, or backup slot — plus the fix for tiny available-shrink-space.
- Hide a Partition in Windows 11 with Diskpart — Remove a drive letter via diskpart to keep a partition out of File Explorer. Casual hiding, not encryption.
- Install Windows XP from a USB Drive (2026 Retro Hardware Guide) — Bootable XP USB for retro hardware, industrial controllers, or archival rigs — Rufus, WinToFlash, and Disk Imager methods.