
Home Assistant is the single most popular home-automation platform in 2026, and Home Assistant OS (HassOS) is the easiest way to run it. It’s a dedicated Linux distribution that boots on a Raspberry Pi, handles Z-Wave, Zigbee, WiFi smart devices, and pretty much everything in your smart home. The first step is getting HassOS onto an SD card, which is where Win32 Disk Imager comes in. I’ve set up maybe a dozen Home Assistant installations over the years (my own, friends’, family members’), and the Win32 Disk Imager workflow is reliable and well-documented once you know the quirks.
This article walks through the complete HassOS setup using Win32 Disk Imager: picking the right Pi, selecting SD card, downloading the right image (there are multiple), flashing, first-boot configuration, and post-install essentials. Plus the common gotchas: wrong image variant, Pi 5 compatibility considerations, network setup, and backup workflow once it’s running.
TL;DR: Download Home Assistant OS .img.xz from home-assistant.io/installation/raspberrypi. Pick the right variant for your Pi (5, 4, 3, Zero 2 W). Decompress with 7-Zip. Win32 Disk Imager Write to a 32 GB+ SD card. First boot takes 20-40 minutes (HA downloads add-ons). Access via http://homeassistant.local:8123 in browser. Configure onboarding.
Choosing Your Hardware
Home Assistant OS runs on various Pi models. Performance matters:
- Pi 5 (4GB/8GB): Best choice in 2026. Runs HA with dozens of integrations smoothly. Handle large Zigbee networks (50+ devices). Recommended if starting fresh.
- Pi 4 (4GB/8GB): Sweet spot for value. Still fully supported, great performance for most home setups.
- Pi 3B/3B+: Works but slow. Not recommended for new setups with many integrations.
- Pi Zero 2 W: Minimal HA, maybe 5-10 devices. Mostly for limited/headless scenarios.
- Pi 1 / Zero original: Not officially supported. Skip.
Recommendation: Pi 4 8GB at $65, or Pi 5 4GB at $60. Both handle typical smart-home loads easily. Pi 5 for futureproofing, Pi 4 for absolute value.
SD Card Choice Matters
Home Assistant writes frequently (database updates, logs, state changes). SD card endurance matters more than for casual Pi use.
- 32 GB minimum. 64 GB recommended for future headroom.
- High Endurance required for 24/7 use. SanDisk High Endurance, Samsung PRO Endurance, or Kingston Industrial Grade. Consumer cards die in 6-18 months of HA use.
- A1 or A2 speed rating. Random I/O matters for HA responsiveness.
- Skip bargain cards. A $5 knockoff 32 GB card will die fast and potentially corrupt your HA install.
Better option: use an external USB SSD for Pi 4/5 boot. SSDs last 10-50x longer than SD cards under heavy write loads. See our SD backup guide for SSD migration paths.
Downloading HassOS
Go to home-assistant.io/installation/raspberrypi or direct-link github.com/home-assistant/operating-system/releases.
Pick the right variant for your Pi model:
haos_rpi5-*.img.xzfor Pi 5.haos_rpi4-64-*.img.xzfor Pi 4 / Pi 400 (64-bit).haos_rpi3-64-*.img.xzfor Pi 3 (64-bit).haos_rpi3-*.img.xzfor Pi 3 (32-bit, older/slower).haos_ova-*.qcow2for virtual machines (not for Pi).
Typical file size: 400-600 MB compressed. Pick the .img.xz variant for your exact Pi model. Wrong variant won’t boot.
Download. Verify SHA256 against the published hash on the release page. See our hash verification guide.
Decompressing the .img.xz
Win32 Disk Imager needs raw .img, not compressed .img.xz. Decompress:
- Right-click .img.xz → 7-Zip → Extract Here.
- Takes 30-60 seconds.
- Produces a ~2-3 GB .img file.
If you don’t have 7-Zip: install from 7-zip.org (free, open-source).
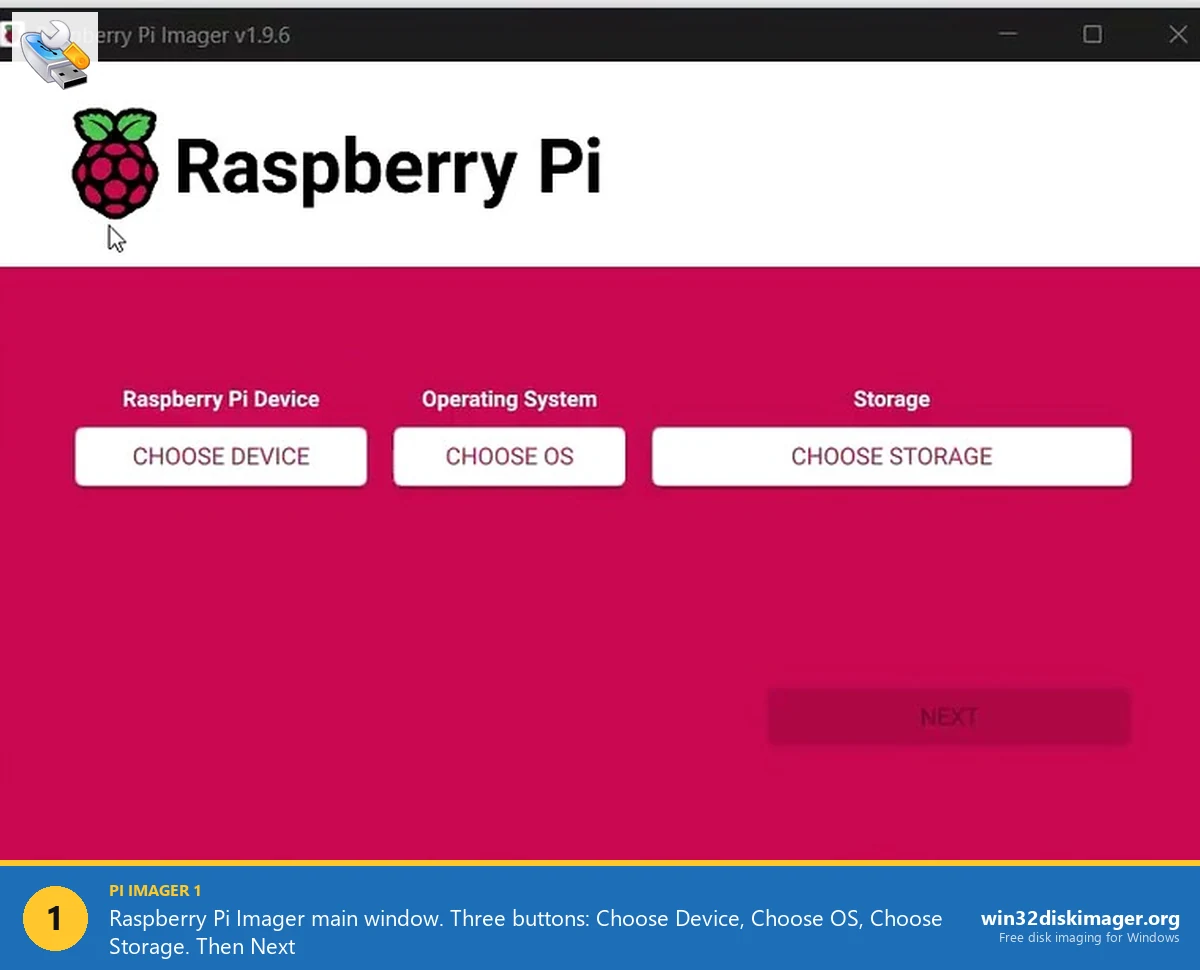
Alternative: use Raspberry Pi Imager or balenaEtcher (both support .img.xz natively via on-the-fly decompression). Win32 Disk Imager requires decompression first.
Flashing the SD Card
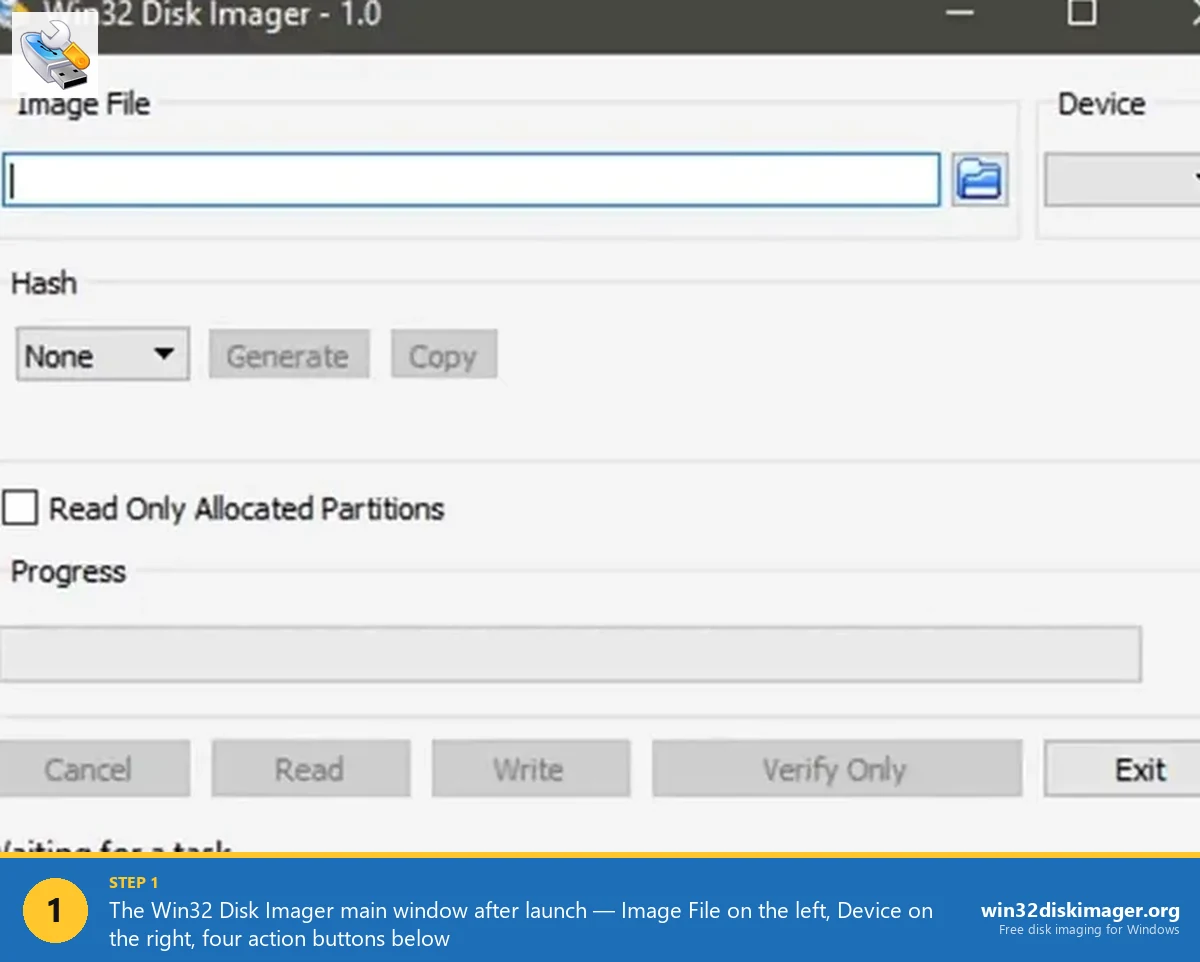
Standard Win32 Disk Imager workflow:
- Insert SD card into USB reader on Windows PC.
- Launch Win32 Disk Imager as admin.
- Click folder icon → navigate to decompressed HassOS .img → Open.
- Select SD card in Device dropdown (triple-check, don’t write to your C: drive).
- Click Write. Confirm. Wait 2-3 minutes for ~2-3 GB image on USB 3.0.
- “Write Successful” notification.
- Click Verify Only. Takes 2-3 minutes. Verifies byte-perfect copy.
Eject safely. Pop SD card out of reader.
First Boot and Initial Setup
Insert SD card into Pi. Plug in power. Connect ethernet cable (WiFi works too, but ethernet is simpler for first boot).
First boot timing:
- 0-60 seconds: HassOS expands root partition to fill SD card. Reboots automatically.
- 60-120 seconds: HassOS launches supervisor, downloads core HA components.
- 2-20 minutes: Initial HA setup. Downloads the Home Assistant Core Docker container, initializes configuration, starts services.
Full first-boot: 10-30 minutes depending on internet speed. Don’t panic if the Pi seems slow; it’s downloading multi-GB of Docker images.
Wait for Pi’s activity LED to settle into normal blinking pattern. Indicates HA is running.
Accessing Home Assistant
Open a browser on any device on the same network. Go to:
http://homeassistant.local:8123If .local doesn’t resolve (some routers disable mDNS), find the Pi’s IP via your router’s admin panel and use:
http://192.168.1.x:8123Replace 192.168.1.x with the Pi’s actual IP (often shown in router admin as “homeassistant” or similar).
Home Assistant onboarding screen appears:
- Create owner account (username + password).
- Set location (for weather integrations, time zone).
- Pick unit system (metric/imperial).
- HA auto-discovers devices on your network.
- Add integrations (can do this later too).
You now have Home Assistant running.
Post-Install Essentials
Things to do immediately after first boot:
1. Update HA to latest version. Settings → System → Updates → apply all pending. Takes 10 minutes but catches security patches.
2. Enable SSH addon. Settings → Add-ons → Add-on Store → install “SSH & Web Terminal”. Set password, configure. Enables command-line access for advanced config.
3. Install File Editor addon. Edits config YAML files directly from HA web UI.
4. Set up backups. Settings → System → Backups → Create backup. Download locally. Also configure scheduled backups (weekly minimum).
5. Add your first integration. Settings → Devices & Services → Add Integration. Start with something easy like your router or a Hue bridge.
6. Consider Nabu Casa Cloud subscription. $6.50/month. Adds remote access, voice assistants. Optional but convenient.
Configuring WiFi (If No Ethernet)
For headless WiFi-only setup:
Option A: Pre-configure before flashing. After flashing with Win32 Disk Imager, Windows mounts the “hassos-boot” partition. Create a folder CONFIG/network/my-network on this partition with the WiFi config inside.
Content of my-network file:
[connection]
id=my-network
uuid=12345678-1234-1234-1234-123456789abc
type=802-11-wireless

[802-11-wireless]
mode=infrastructure
ssid=YourSSID
hidden=false

[802-11-wireless-security]
auth-alg=open
key-mgmt=wpa-psk
psk=YourPassword

[ipv4]
method=auto

[ipv6]
addr-gen-mode=stable-privacy
method=auto
Replace YourSSID and YourPassword with actual values. Insert SD into Pi, boot. HA connects to WiFi automatically.
Option B: Connect via ethernet for first boot, then configure WiFi through HA UI. Settings → System → Network → Configure. Simpler if you have an ethernet cable handy.
Common First-Boot Issues
Pi doesn’t boot (red LED only). Power supply isn’t sufficient. Pi 4 needs 5V 3A USB-C. Pi 5 needs 5V 5A. Use the official Raspberry Pi power supply.
Rainbow splash screen persists. HassOS build doesn’t match Pi model. Re-download the correct variant (rpi5 vs rpi4 vs rpi3).
Green LED blinks but no web interface. HA is still starting up. Wait 20+ minutes on first boot. If still nothing after an hour, check router for Pi IP, try http://IP:8123.
homeassistant.local doesn’t resolve. Some routers disable mDNS. Use IP address directly. Or configure router to support .local hostnames.
HA shows “Preparing Home Assistant” forever. First boot can legitimately take 30 minutes. If over an hour, something’s wrong. Check Pi’s SD card (might be slow/dying), check internet (HA needs to download ~2 GB).
Pi 5-Specific Considerations
Pi 5 introduced some changes HA users should know:
- Requires 5V 5A USB-C PSU (old 5V 3A won’t suffice).
- Uses different HassOS variant (haos_rpi5-*.img.xz).
- Has native USB 3 ports that handle USB SSDs well.
- NVMe HAT support (M.2 NVMe for Pi 5). Excellent for HA, much faster than SD.
- Cooling recommended — Pi 5 runs hotter than Pi 4.
For new HA deployments, Pi 5 + NVMe HAT + industrial SD card for boot is the dream setup. $150 total, lasts years.
Backup Before You Grow Attached
Once you’ve spent an afternoon setting up integrations, adding devices, configuring automations, you’ve got a valuable setup. Back it up.
HA native backup: Settings → System → Backups → Create. Downloads a .tar file with all config. Easy but Home-Assistant-specific.
Full SD image backup: Shut down HA (Settings → System → Power → Shutdown), wait, pull SD, Win32 Disk Imager Read to .img on Windows PC. Full byte-level backup. See our SD backup guide.
Recommended combo: HA native backups weekly (for quick config recovery) + full Win32DI IMG backup monthly (for whole-card restore if card fails). Store on NAS or cloud.
USB Boot (Skip the SD Card)
For Pi 4/5, skipping SD in favor of USB SSD makes HA dramatically more reliable:
- Get a USB 3 SSD (250 GB-1 TB, $40-80). Brands: Samsung T7, Crucial X6.
- Flash HassOS to the USB SSD same workflow as SD card.
- Configure Pi for USB boot (default on Pi 5, check Pi 4 firmware).
- Insert USB SSD into Pi’s USB 3 port.
- Power on.
SSDs have orders-of-magnitude better write endurance than SDs. HA’s constant database writes are a non-issue on SSD. My 24/7 HA setup on USB SSD has been running 3 years without issues.
Slight price bump, huge reliability win.
Alternative Install Methods
HA can be installed other ways:
- HassOS via Raspberry Pi Imager: Pi Imager’s OS picker includes Home Assistant. Automated download and flash. Easier for beginners. See Pi OS install guide for Pi Imager context.
- Home Assistant Supervised on Debian/Ubuntu: Install base Linux first, then HA on top. More flexible but complex. Not recommended for beginners.
- Home Assistant Core in Docker: For users who already have Docker set up. Runs HA Core without Supervisor or Add-ons. Advanced.
- HassOS in a VM (Proxmox, VMware): Use the .qcow2 or .vdi image. Good for home-lab setups.
For dedicated Pi install: HassOS .img.xz + Win32 Disk Imager is the mainstream path. 90% of HA users go this route.
Performance and Resource Usage
What to expect from HA running on a Pi:
Idle: 500 MB RAM, 2-5% CPU. Pi 4 4GB handles this easily.
Moderate use (20 integrations, 50 devices): 1-1.5 GB RAM, 5-15% CPU average. Spikes to 30% during automation runs.
Heavy use (100+ devices, video cameras, ESPHome, recorder history): 3-5 GB RAM, 20-40% CPU. Pi 4 8GB or Pi 5 4GB handles it. Pi 4 4GB struggles.
SD card writes per day: 1-5 GB depending on recorder settings. This is why SD endurance matters.
For serious HA users, USB SSD boot is transformative. 5x faster UI response, 20x longer drive life.
Sample First-Week Setup
What to do week 1 after getting HA running:
- Day 1: Initial install, create account, add one integration (your router/modem).
- Day 2: Install Terminal and File Editor addons. Explore Settings and Integrations.
- Day 3: Add smart bulbs / switches (Philips Hue, Shelly, or whatever you have).
- Day 4: Configure first automation (e.g., turn on lights at sunset).
- Day 5: Install Mobile App (iOS/Android), set up device_tracker for presence detection.
- Day 6: Explore dashboard customization (Lovelace UI).
- Day 7: Backup everything (HA native + Win32DI full image).
Gradual onboarding prevents overwhelm. HA has a lot of features; don’t try to configure everything immediately.
Zigbee and Z-Wave Add-ons
Most advanced HA setups add Zigbee or Z-Wave via USB adapter:
Zigbee: plug a USB Zigbee coordinator (Sonoff Zigbee 3.0 Dongle, ConBee II, Home Assistant SkyConnect). HA’s Zigbee2MQTT addon handles the protocol. Most smart bulbs, switches, sensors speak Zigbee.
Z-Wave: Z-Wave USB stick (Aeotec Z-Stick, Zooz 800 Series). Z-Wave JS UI addon handles it. More common in North America for smart locks and some sensors.
Install flow identical to other addons: Add-on Store → Install → Configure → Start. Flash the adapter firmware through the add-on UI. Most setups take 15-30 minutes including device pairing.
Common Integrations That Work Out of the Box
Big wins in Home Assistant’s Devices & Services auto-discovery:
- Philips Hue bridges (auto-detected, 10-sec setup).
- Google Home / Chromecast (auto-detected).
- Sonos speakers (auto-detected).
- Shelly smart switches (Matter discovery).
- ESPHome devices (auto-detected if on same network).
- Nanoleaf / Yeelight lighting.
- Tuya/Smart Life devices (via Local Tuya addon).
- MQTT brokers (configure Mosquitto addon).
- IP cameras (via generic RTSP integration or camera-specific).
Adding these is usually “click the notification, enter credentials if needed, done.” HA is designed for this friction-free flow.
FAQ
What happens during first boot for 20 minutes?
HassOS expands partition, downloads Docker images (Home Assistant Core, Supervisor), initializes the database, starts services. Legitimate process. Patient waiting is required.
Can I install HA on any Pi OS like a normal package?
HassOS is the recommended path because it’s pre-configured and self-managed. You can install HA Core manually on Pi OS, but you lose add-on support and have to manage updates yourself. Not recommended unless you have specific reasons.
Does HA need static IP?
Not technically, but yes practically. If Pi’s IP changes, homeassistant.local still works but bookmarks break. Set router DHCP reservation for the Pi’s MAC address. Or configure static IP in HA Settings → System → Network.
Can I run HA on an SD card that also has Pi OS?
No. HassOS takes the entire SD card. If you want Pi OS + HA, you’d need two separate SD cards and swap them, or install HA Core on Pi OS (losing add-on support).
How often does HassOS update?
HA Core: monthly major releases, weekly minor. HassOS (the underlying OS): every 1-3 months. Automatic update available via HA UI.
Is HA free?
HA itself is free, open-source. Nabu Casa Cloud subscription ($6.50/month) is optional, adds remote access without port forwarding and Alexa/Google Assistant integration. Most advanced features work without Cloud.
Can I access HA from outside my network?
Three options: (1) Nabu Casa Cloud ($6.50/mo), easiest. (2) VPN into home network (WireGuard, ZeroTier), free but requires setup. (3) Port forwarding + DuckDNS (free), requires network expertise and some security considerations.
What if I want to move HA to different hardware later?
Use HA’s built-in backup feature. Create backup → download to PC. Install HassOS on new hardware, restore from backup during onboarding. Preserves all config, integrations, history.
How do I know HA is running?
Browser to http://homeassistant.local:8123 shows UI. Or http://Pi-IP:8123. If page loads with login screen, HA is running. If connection fails, HA isn’t ready yet or Pi isn’t on network.
Can I run HA on Raspberry Pi Zero?
Pi Zero 2 W: marginal, 5-10 devices only. Pi Zero original: not officially supported. For real HA use, Pi 3B minimum, Pi 4 recommended.
What’s the difference between HA Core, HA OS, HA Supervised, HA Container?
HA OS (HassOS): dedicated OS, full features, self-managed. Recommended. HA Supervised: HA on existing Debian/Ubuntu, manual OS management. HA Container: HA Core in Docker, no add-ons. HA Core: Python install, most manual. For new users: HassOS.
Is a PoE HAT a good idea for HA Pi?
Yes if your network switch supports PoE. Single ethernet cable for network + power. Cleaner install, fewer cables. PoE HAT: $20 addon for Pi 4/5.
Wrapping Up
Home Assistant OS install via Win32 Disk Imager is a 30-minute job: download, decompress, flash, first boot, configure. Once running, HA becomes the hub for every smart-home device you’ll ever add. Back up regularly (HA native + Win32DI monthly) so a failing SD card doesn’t wipe your automations. For more Pi flashing workflows, see Pi OS install guide, RetroPie install, and SD backup guide.
Related Guides
Pair this guide with the rest of the Win32 Disk Imager knowledge base. These cover the adjacent workflows you’ll hit when working with disk images, bootable USBs, and Windows partition management.
- How to Install Raspberry Pi OS Using Win32 Disk Imager (2026 Guide) — Complete Pi OS installation on Windows with Win32 Disk Imager — OS variant picking, headless config files, and the first-boot troubleshooting list.
- How to Install RetroPie on SD Card with Win32 Disk Imager (2026) — Flash RetroPie to SD with Win32 Disk Imager. Pi model picks, ROM transfer methods, controller config, performance table, BIOS files explained.
- How to Back Up an SD Card to an IMG File on Windows — Back up a Raspberry Pi SD card to an IMG file on Windows — full Read walkthrough, PiShrink compression, and a backup-schedule template.
- How to Use Win32 Disk Imager — Complete Beginner Guide — The full reference for the Win32 Disk Imager tool itself — install, UI walkthrough, and common workflows.