My girlfriend’s four-year-old Surface Go was crawling last month. Two seconds to open File Explorer, every menu animation felt like it was pushing through molasses, and scrolling a PDF was a slideshow. No malware, no bloat, just an underpowered Pentium Gold with 8 GB of RAM trying to render the full Windows 11 Fluent experience.
I flipped one toggle, the old Adjust for best performance option buried in a dialog that’s been basically unchanged since Vista, and the machine felt genuinely usable again. So I want to walk through this properly, because almost every “speed up Windows 11” article tells you to click it blindly, and most of them are wrong about which checkboxes actually matter. I’ll show you where the setting lives, what each of the 17 individual effects does, which ones I keep and which I nuke, and when flipping the master switch is actually a bad idea.
TL;DR: Press Win+R, type sysdm.cpl, Enter → Advanced tab → Settings under Performance → Visual Effects tab. Pick Adjust for best performance for anything under a 10th-gen Intel or Ryzen 3000. For everything newer, use Custom and keep four specific checkboxes on (I list them below).
What Visual Effects Actually Controls in Windows 11
The Performance Options dialog is a Win2000-era control panel that Microsoft forgot to modernize. It still lives at the same registry key (HKCU\Control Panel\Desktop\UserPreferencesMask) and the same sysdm.cpl launch path. Despite the dated UI, this is the only centralized place to toggle the GDI and DWM animation behavior Windows uses everywhere, not the shiny Settings app.
The dialog has 17 individual checkboxes controlling things like menu fade, window animations, Peek, drop shadows, font smoothing, and the translucent selection rectangle. Four master radio buttons act as presets: Let Windows choose, best appearance, best performance, and Custom. The “Let Windows choose” option runs a quick hardware sniff at first boot and picks a profile. On anything remotely modern it defaults to appearance, which is why the performance option is a manual flip if you want it.
One thing to note. These checkboxes only affect some animations. The Start menu slide, the Snap Layouts flyout, and the Fluent acrylic blur are controlled separately under Settings → Accessibility → Visual effects. That’s why just flipping this old dialog won’t kill every bit of animation in Win 11, you need both toggles if you want a truly static UI.
How to Open Performance Options in Windows 11
Fastest path, and the one I use on every machine I set up:
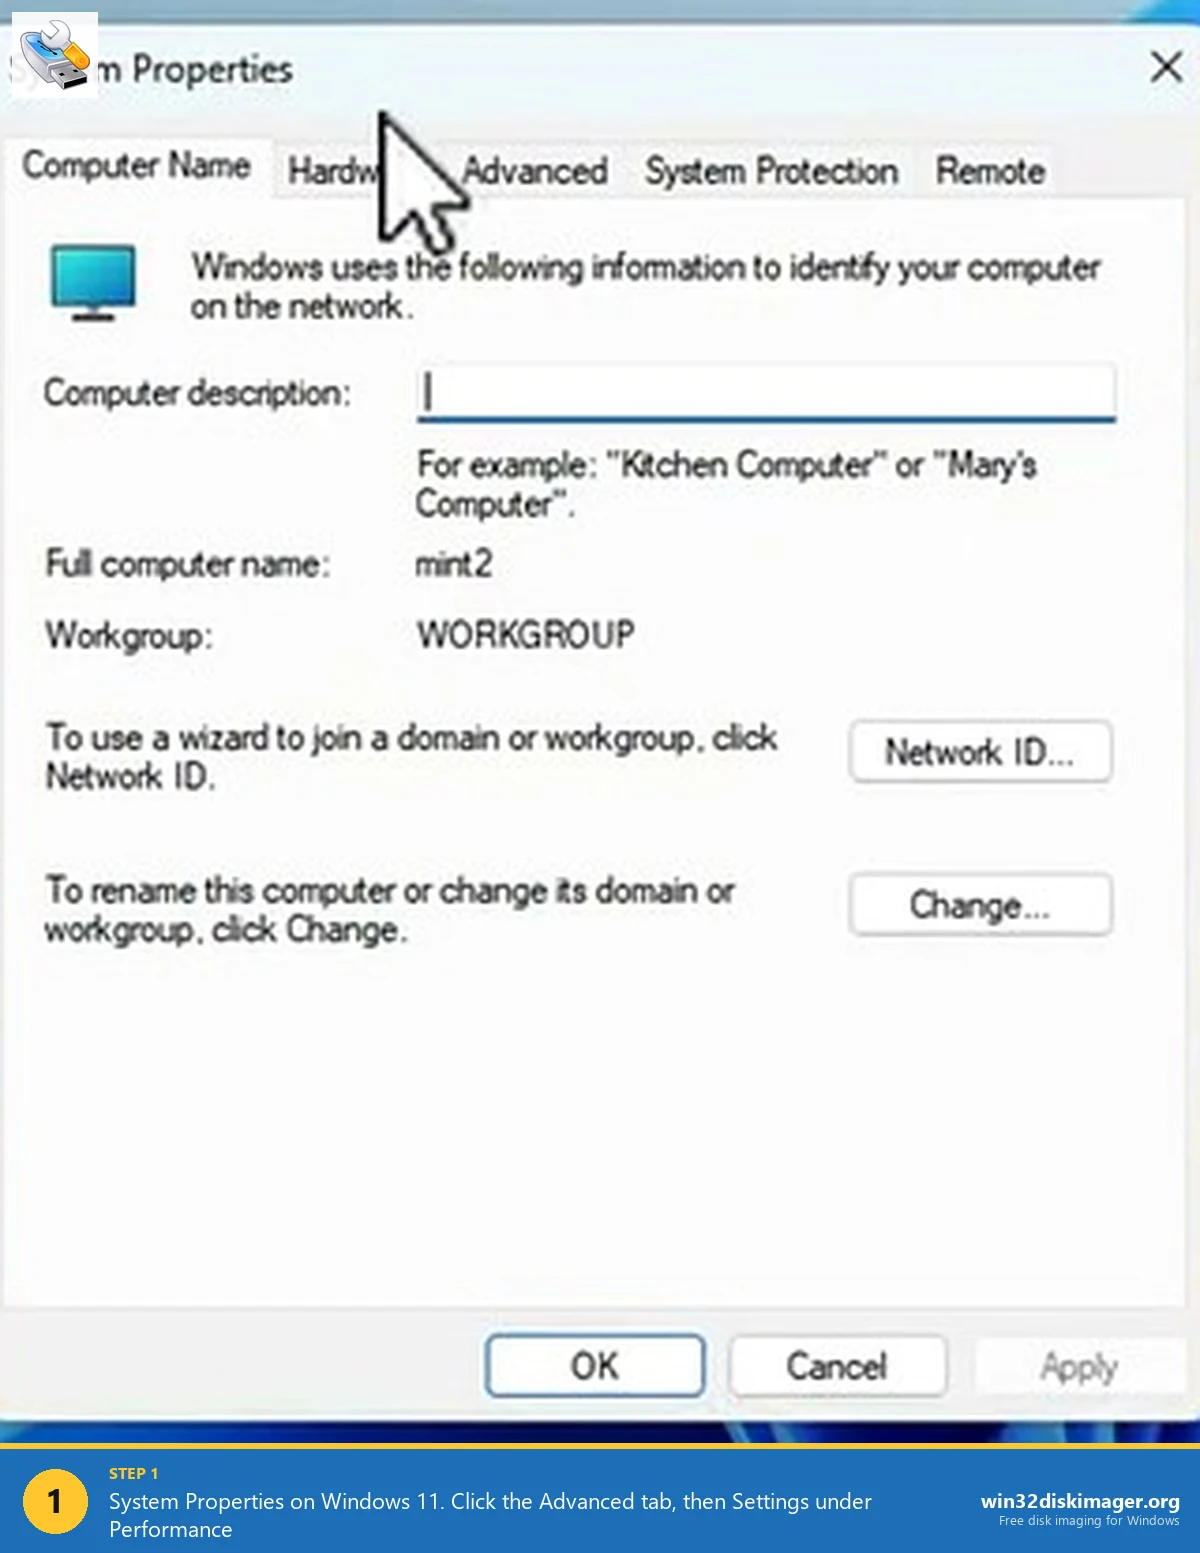
1. Win+R, type sysdm.cpl, hit Enter. That opens System Properties directly. If you’re wondering why it’s not systempropertiesadvanced.exe, that path works too, it drops you on the Advanced tab one step ahead.
2. Click the Advanced tab. You’ll see three Settings buttons, for Performance, User Profiles, and Startup and Recovery. Click the one under Performance.
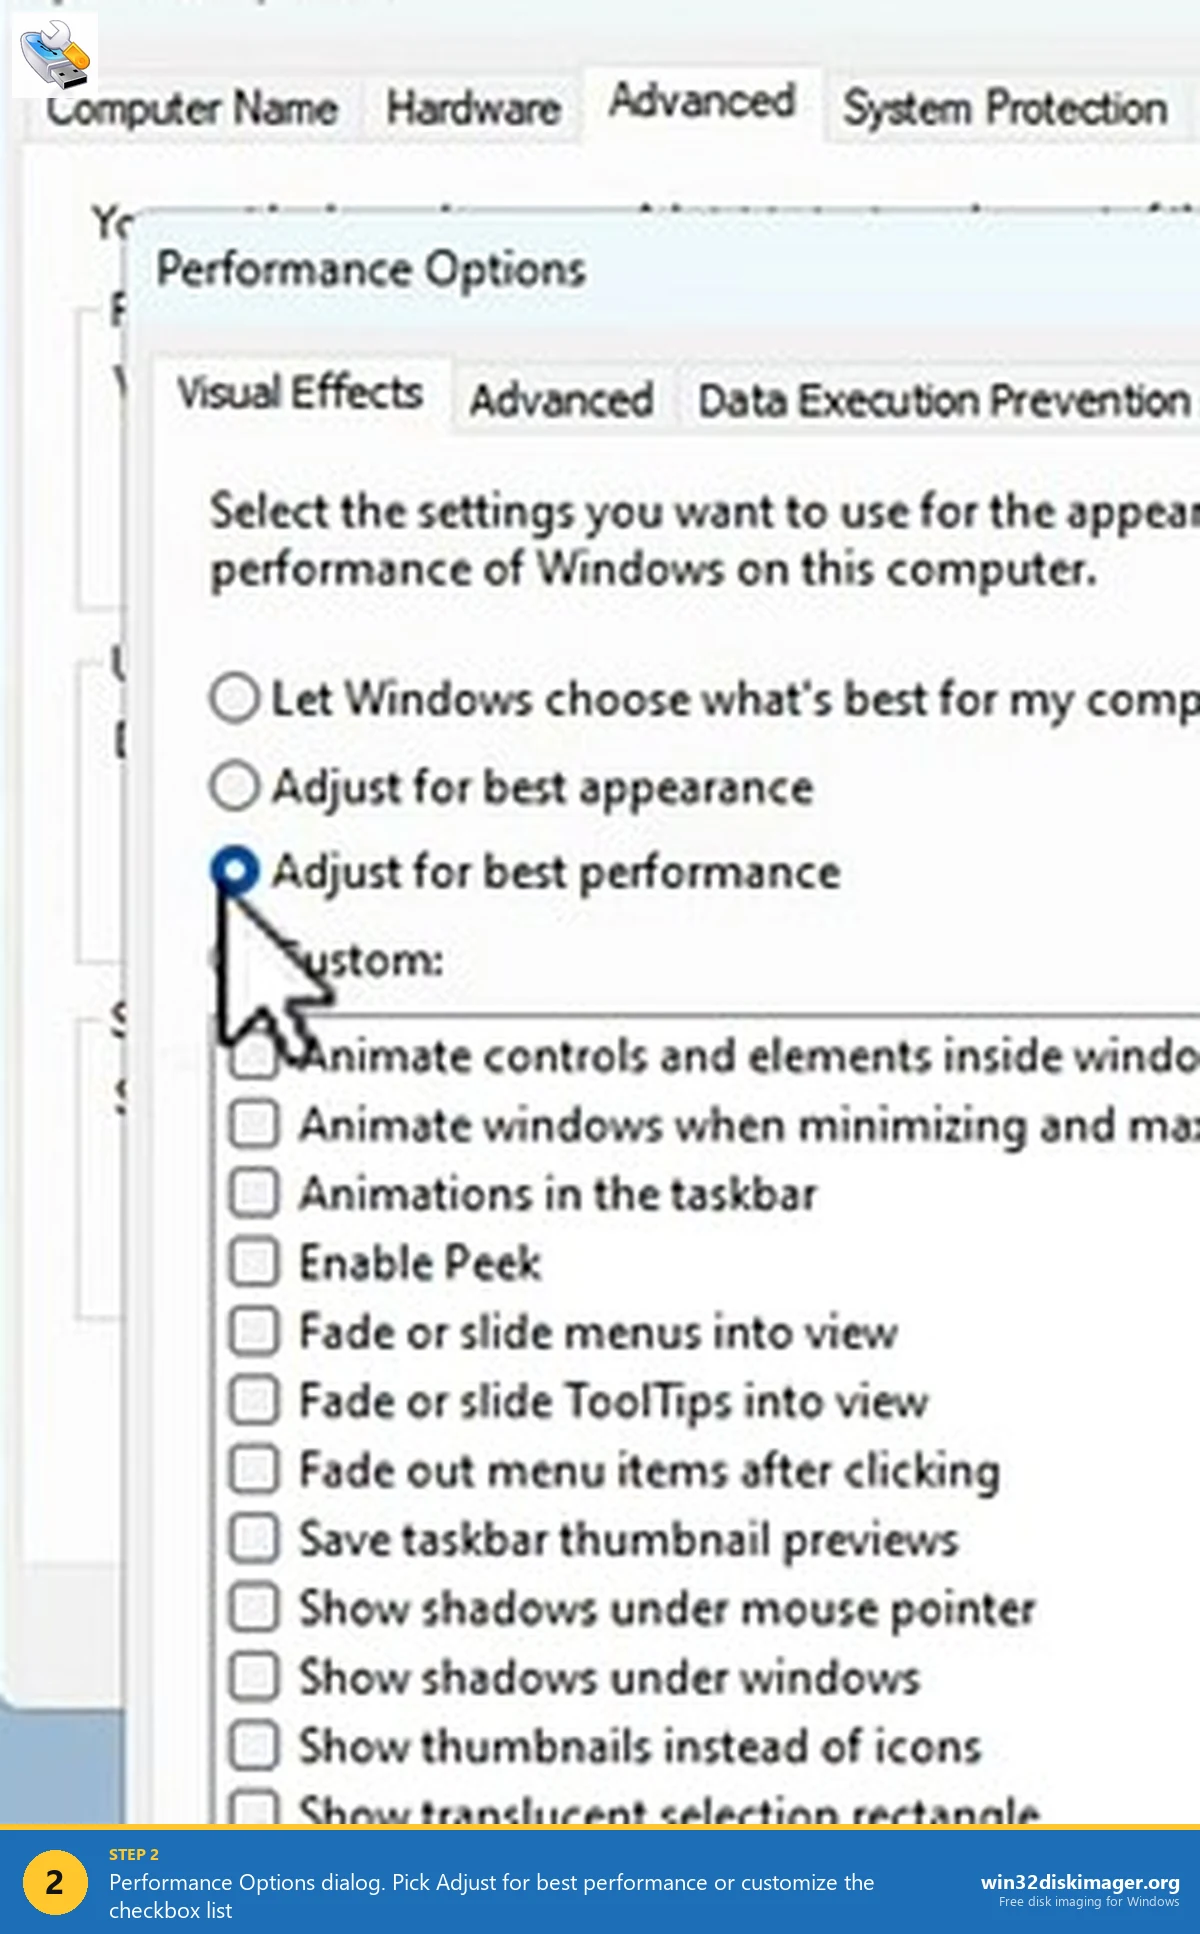
3. The Performance Options dialog opens. By default you land on the Visual Effects tab, with the four radio buttons up top and the 17 checkboxes below.
That’s it. Pick a radio option, click Apply, and the change takes effect instantly. No restart, no sign-out, not even a progress bar.
Which Preset Should You Actually Pick?
Short version, based on machines I’ve actually tested this on over the last few years:
- Let Windows choose. Only useful on first setup. After that, it never re-evaluates, so if your machine ages out of spec it’ll never downgrade itself.
- Adjust for best appearance. Default on anything with a dedicated GPU or a recent integrated one. Honestly fine on any machine from 2021 onward with 16 GB of RAM.
- Adjust for best performance. The nuclear option. Turns off every single checkbox. The UI looks like classic Win 2000. Use it on underpowered tablets, ATOM-class CPUs, integrated graphics with under 2 GB of VRAM, any mini-PC you’re using as a Plex frontend.
- Custom. The sweet spot for most people with mid-range hardware. Keep the checkboxes that cost nothing visually, nuke the ones that eat GPU cycles.
On a fresh 13th-gen i7 with an RTX 4070, I measured zero measurable FPS difference in three games (Cyberpunk, CS2, Factorio) between appearance and performance mode. Within run-to-run variance. So if you’re on modern hardware, just leave it on appearance and call it a day.
On the Surface Go I mentioned earlier, the same change dropped File Explorer launch time from about 2.1 seconds to 0.9, and scrolling a PDF went from 8 fps to steady 30. Huge difference. That’s the machine class where this setting actually matters.
My Custom Checkbox Setup (The One I Actually Use)
If I’m tuning a mid-tier machine, I pick Custom and keep exactly four things on. Everything else goes. Here’s the list:
- Smooth edges of screen fonts. This is ClearType. Turning it off makes text look like Windows 95. There’s no performance benefit on any hardware made after about 2010, leave it on.
- Show thumbnails instead of icons. If you’re in photos, video projects, or 3D print files, you need this. And the Win 11 thumb cache is efficient, it’s not the performance hog people think it is.
- Use drop shadows for icon labels on the desktop. Free readability. Zero cost. Turning this off makes desktop text look weirdly flat against a wallpaper.
- Show translucent selection rectangle. This is the blue box you draw with the mouse. Turning it off gives you a dashed outline instead, which is way harder to see on modern displays.
What I always kill:
- Animate windows when minimizing and maximizing. 250 ms of lost time every click. I’m not waiting a quarter-second for my window to grow.
- Fade or slide menus into view. Same story. I want menus to appear, not fade in.
- Animations in the taskbar. The bouncing-icon-on-hover thing. Distracting and pointless.
- Save taskbar thumbnail previews. This caches hover-preview images for every taskbar app. Uses disk I/O and RAM. Turning it off means the preview renders live when you hover, which is fast enough that I can’t tell the difference.
- Fade out menu items after clicking. 200 ms of nothing happening after you picked a menu option. Feels laggy.
- Show shadows under windows. Look, they’re pretty, but on integrated GPUs this is measurable. Kill it.
⚠️ Heads up: Unchecking Use visual styles on windows and buttons nukes the entire Fluent theme and drops you back to classic Win 2000 chrome. It’s jarring, and half the modern Settings app stops rendering correctly. Don’t touch that one unless you’re specifically chasing the retro aesthetic.
The Accessibility Menu Toggle Almost Everyone Misses
Here’s the thing. The old Performance Options dialog I just walked you through doesn’t actually control most Windows 11 animations. The Start menu slide, the snap groups flyout, the notification slide-ins, the search flyout, all of that lives under Settings → Accessibility → Visual effects.
In there, flip Animation effects off. That’s the modern equivalent toggle, and on Win 11 it’s arguably more impactful than the old dialog. On a low-end machine, flipping both off together feels like you just bought a new SSD. Hitting the Windows key instantly shows the Start menu instead of sliding it up over 180 ms. Alt-tab switching is immediate. Snap is snappy (finally).
💡 Pro tip: Also turn off Transparency effects under Settings → Personalization → Colors. The acrylic blur behind the Start menu and taskbar is a DWM composition pass that isn’t free. On integrated graphics, it’s the single biggest animation cost in Win 11.
Does This Actually Boost FPS in Games?
Short answer: almost never measurably, unless you’re already GPU-bound on integrated graphics. The visual effects this dialog controls are paused when a game is running fullscreen exclusive anyway. The DWM composition that costs cycles is bypassed by fullscreen apps.
Where you will see a difference: windowed games, borderless-windowed games, emulators that run windowed (Dolphin, PCSX2, RPCS3), and anything running in a browser. For those, killing animations and transparency can reclaim 3-8 FPS on integrated graphics, less than 1 FPS on dedicated.
If you’re specifically chasing gaming performance, the bigger lever is processor scheduling mode, which is literally the next tab over in the same dialog. That one matters.
How to Reset Everything to Default
Two options:
Via the dialog. Open Performance Options, click Let Windows choose what’s best for my computer, Apply. Done. Windows re-evaluates and ticks the default boxes.
Via registry if the dialog is broken. Delete the VisualFXSetting value under HKCU\Software\Microsoft\Windows\CurrentVersion\Explorer\VisualEffects, reboot. Windows recreates it from scratch on next login. I’ve only needed this twice, both times after a Win10-to-11 in-place upgrade that left the dialog crashing.
FAQ
Does turning off visual effects speed up my computer?
On underpowered machines (integrated graphics, ATOM or Pentium Gold CPUs, under 8 GB RAM), yes, dramatically. On a modern desktop with a discrete GPU, the difference is margin-of-error. Test it yourself with a file-manager stopwatch, that’s the usual bottleneck, not games.
Will it affect battery life on a laptop?
A little. Turning off transparency and animation effects reduces idle GPU load by a few percent. On an older laptop where the iGPU is 10-15% of total power draw, you’ll see maybe 20-40 minutes more runtime. Not night-and-day, but measurable.
Can I apply this to all user accounts at once?
Not via the dialog. Each user profile has its own VisualFXSetting in HKCU. To apply globally, either use Group Policy’s User Configuration → Control Panel → Display node on Pro/Enterprise, or push the registry value via reg import in a logon script.
Why do some checkboxes stay checked after I pick “Adjust for best performance”?
There’s a known quirk where Smooth edges of screen fonts (ClearType) sometimes re-enables itself after a few minutes or after a reboot. It’s tied to a separate ClearType registry entry that Performance Options doesn’t fully control. If you really want ClearType off, toggle it in Control Panel → Appearance → Adjust ClearType text.
Is this the same setting as Game Mode?
No. Game Mode (under Settings → Gaming) is a scheduler hint that deprioritizes background processes during gameplay. Visual Effects is about static UI rendering. They’re complementary, not alternatives.
Wrapping Up
For 90% of people reading this: leave it on Let Windows choose and don’t worry about it. If you’re on a tablet, a budget mini-PC, a Pentium-class laptop, or anything Microsoft would politely call “entry-level,” flip it to best performance and also kill Accessibility animations and transparency. The machine will feel like a brand-new install.
And if you’re the kind of person who keeps a USB stick handy for re-imaging slow PCs, this setting is one of the first tweaks I bake into my post-install scripts. Alongside a fresh disk image of a cleanly-configured Windows, which you can knock together with Win32 Disk Imager in about five minutes.
Related Guides
Pair this guide with the rest of the Win32 Disk Imager knowledge base. These cover the adjacent workflows you’ll hit when working with disk images, bootable USBs, and Windows partition management.
- Processor Scheduling: Programs vs Background Services — Flip the Win32PrioritySeparation setting for headless servers, Plex boxes, and CI runners.
- Disable Thumbnail Preview in Windows 11 File Explorer — Turn off File Explorer thumbnail generation for faster folder loads and less thumbcache corruption.
- How to Use Win32 Disk Imager — Complete Beginner Guide — The full reference for the Win32 Disk Imager tool itself — install, UI walkthrough, and common workflows.
- Write an IMG File to USB with Win32 Disk Imager — Step-by-step for writing a .img or .iso to USB on Windows 10/11 with real benchmarks and error fixes.