A buddy of mine was complaining last week that his Plex server was stuttering whenever he opened a browser on the same box. Not a RAM issue, not a network issue. The CPU was fine on average. But foreground apps were stealing priority from the streaming service every time he alt-tabbed.
This is exactly what Windows’s Processor Scheduling setting controls, and it’s been sitting in the same dusty dialog since Windows XP. I’ve been flipping this one on headless boxes, build servers, and home NAS machines for years. Here’s the modern Win 10 / Win 11 walkthrough, when to actually change it (spoiler: most of you shouldn’t), and a few adjacent CPU-priority tricks that actually matter more in 2026.
TL;DR: sysdm.cpl → Advanced → Performance → Settings → Advanced → pick Programs (default, for desktops) or Background services (for servers, renderers, Plex, bots). One-click change, no reboot.
What Processor Scheduling Actually Does
Windows gives every thread a scheduling quantum, basically how long it gets to run before the scheduler yanks it and hands the CPU to someone else. The Processor Scheduling setting controls the size of that quantum for foreground vs. background threads.
Programs mode (the default). Foreground apps get short, variable quanta, which means Windows switches away from them quickly to keep other foreground things responsive. Feels snappy when you’re typing or clicking. Background services get longer but fewer quanta.
Background services mode. Everything gets a long, fixed quantum. Nobody’s playing favorites. This is what you want on a machine that’s mostly running headless workloads, a Plex transcoder, a game server, a CI runner, an SQL Server instance.
Registry-level, this is a single value at HKLM\SYSTEM\CurrentControlSet\Control\PriorityControl\Win32PrioritySeparation. Programs = 0x26 (38), Background services = 0x18 (24). You don’t need to touch the registry for this, but if you’re scripting a server build, that’s the knob.
How to Change It in Windows 11 (and 10)
Press Win+R, type sysdm.cpl, hit Enter. This opens System Properties. Click the Advanced tab at the top.
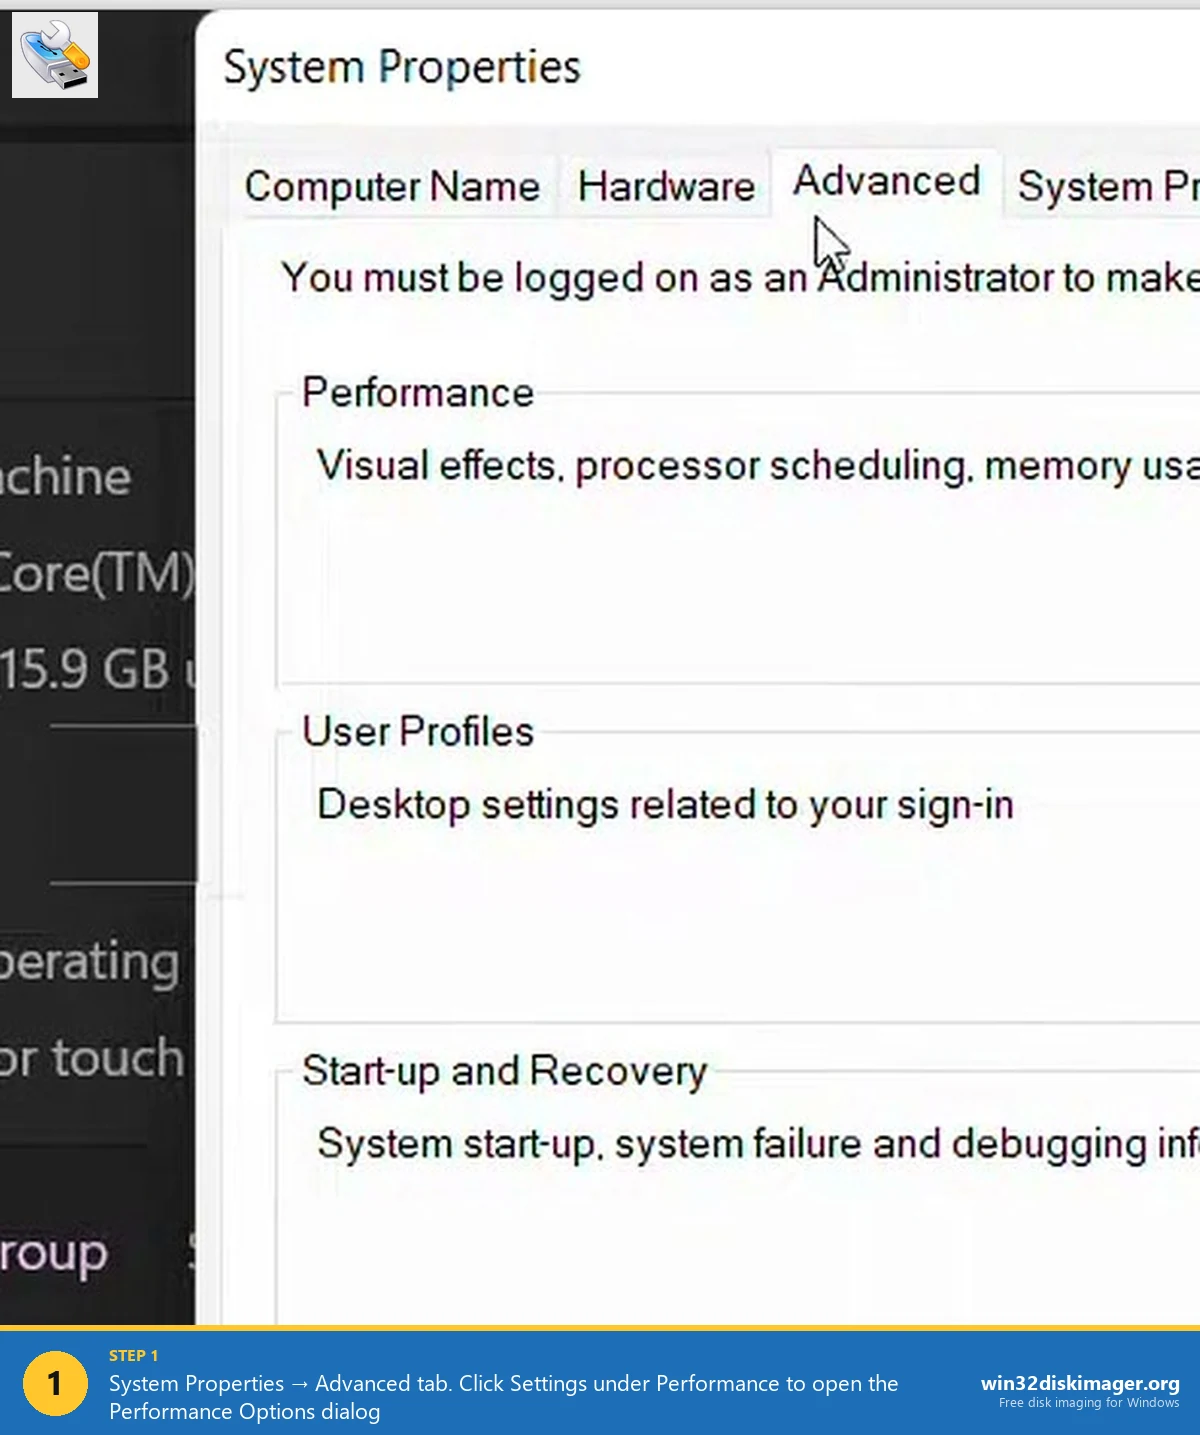
Under the Performance section, click Settings…. That pops up the Performance Options dialog, which itself has its own row of tabs. Click the Advanced tab inside this second dialog (yes, it’s Advanced within Advanced, Microsoft loves that pattern).
You’ll see two radio buttons: Adjust for best performance of: Programs or Background services. Pick whichever fits the role of this machine, click Apply, then OK. The change takes effect immediately. No restart. No sign-out.
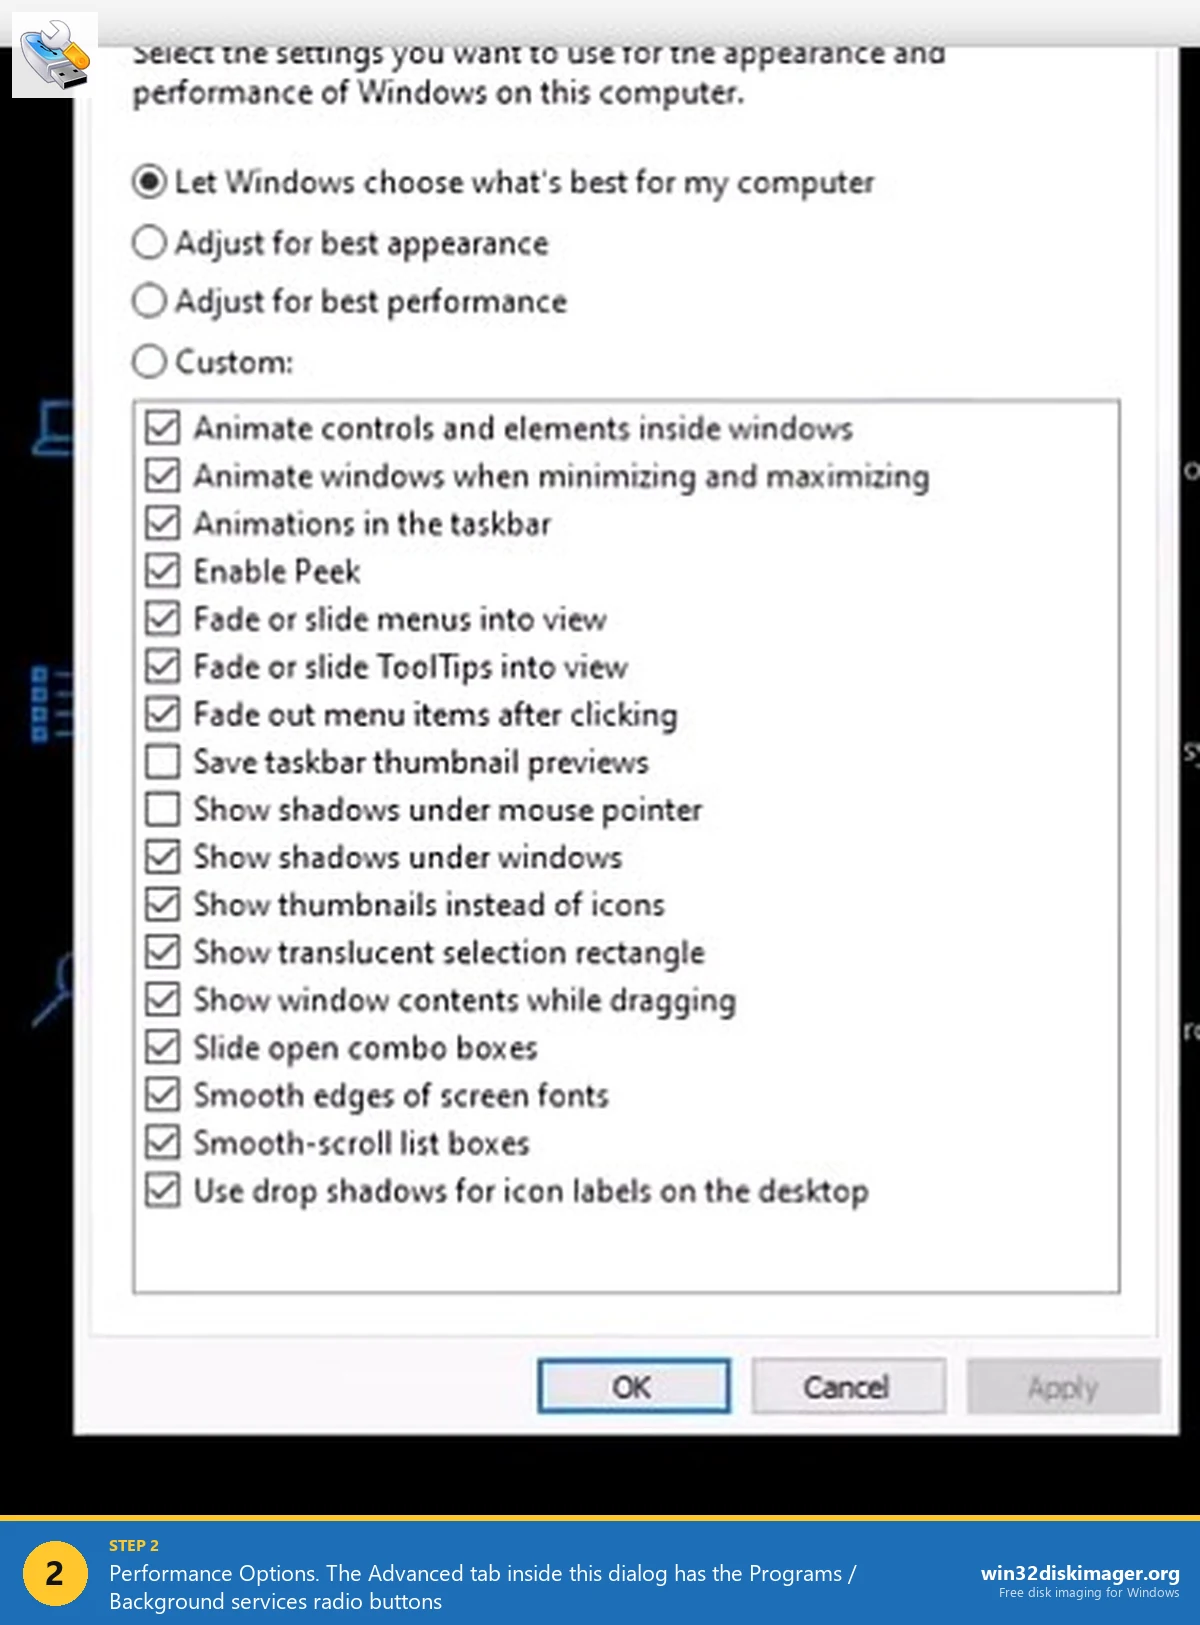
If you don’t see the Advanced tab at all, you’re probably still on the Visual Effects tab. Those checkboxes (animations, shadows, smooth-scroll) are a different thing entirely. Click through to Advanced and you’re where you need to be.
When to Actually Flip It
Almost every article on this topic tells you to leave it on Programs, and that’s right for normal desktop use. But there are a handful of legitimate cases for Background services:
- Plex, Jellyfin, Emby transcoding boxes. You want the encoder to keep feeding frames even if someone RDPs in and opens a browser.
- Home Assistant, Unraid on Windows hosts, Docker Desktop as a 24/7 runtime. Background workloads are the point.
- Game servers (Minecraft, Palworld, Arma, CS dedicated). The server process usually runs without focus. Left on Programs, it loses priority the moment you open Task Manager.
- Build / CI / rendering nodes. Blender, Premiere render queue, MSBuild, dotnet publish. You’ve queued a 2-hour job, you want it to get the lion’s share.
- SQL Server and Oracle installers actually flip this for you during install on dedicated-DB machines.
⚠️ Heads up: On a daily-driver desktop, Background services mode feels subtly worse. Typing gets tiny hitches. Games don’t love it. I had it flipped accidentally on my main machine after running an overclocking tool that touched it, and it took me a week to figure out why YouTube scrubbing felt sluggish.
The Sibling Toggle: Visual Effects
Right next to Processor Scheduling in that same Performance Options dialog is the Visual Effects tab. If your machine feels slow, this is actually a bigger lever than scheduling on hardware older than about 2019.
Four choices there:
- Let Windows choose what’s best for my computer – Microsoft decides based on benchmarks during OOBE
- Adjust for best appearance – everything on
- Adjust for best performance – strip down, looks like Windows 2000
- Custom – cherry-pick each animation and shadow
I pick Custom on every fresh install. Uncheck animations, taskbar animations, minimizing/maximizing, and menu fade. Keep the ClearType smooth fonts, shadows under mouse pointer, and thumbnails boxes. Windows feels about 30% snappier even on brand-new hardware and it looks totally fine.
Per-Process Priority (The More Useful Knob)
Honestly, changing Processor Scheduling is a blunt instrument. If you just want one specific process to get more CPU, Task Manager does it better.
Open Task Manager (Ctrl+Shift+Esc) → Details tab → right-click the process → Set priority. You get Low, Below Normal, Normal, Above Normal, High, Realtime. Bump a Plex server to Above Normal and it won’t get stepped on by browsers.
The catch: this doesn’t persist across restarts. If you want a process to launch at a higher priority every time, wrap it in a start /ABOVENORMAL "" "C:\path\app.exe" batch file, or use a tool like Process Lasso that persists priority rules.
Never use Realtime on anything except kernel-level debugging. It literally outranks the mouse driver. One runaway loop and you can’t move your cursor to kill it.
CPU Affinity (The Other Other Knob)
Same Task Manager location, but right-click → Set affinity. This pins a process to specific cores. Useful for:
- Old games that hate high core counts (Fallout 3, GTA IV, half of the early 2010s catalog). Pin to 2 or 4 cores and a lot of crashes go away.
- Hybrid CPUs (Alder Lake, Raptor Lake, Meteor Lake). If Thread Director is sending your game to E-cores, lock it to P-cores.
- Benchmarking. Reproducibility goes up when you pin to a consistent set of cores.
FAQ
Does setting Background services help gaming? No. Almost everyone who says yes is placebo’ing themselves. If anything it hurts because your game becomes “just another process” instead of getting foreground priority boost.
Does Game Mode do this automatically? Game Mode is a different mechanism. It reduces background Windows updates and scheduled tasks while a fullscreen game is detected. It doesn’t touch Win32PrioritySeparation.
Do I need to reboot? No. The change hits on Apply.
Is this the same as the old Win 7 setting? Identical. The dialog looks a bit different but it writes the same registry value that’s been there since XP.
Will this affect disk imaging / Win32 Disk Imager? Win32 Disk Imager is a foreground app that blocks until the write finishes, so Programs mode is fine. If you’re writing huge images on a server that’s also running services, Background services is slightly kinder to the other workloads, but the image write speed is I/O-bound, not CPU-bound.
Wrap-Up
Processor Scheduling is one of those XP-era settings that survived every Windows redesign and still sits exactly where it used to. On a desktop, leave it on Programs and forget about it. On anything headless or workload-heavy, flip to Background services and your bot / transcoder / server will stop getting elbowed out by whatever you briefly clicked on.
And if you actually want to prioritize one specific app, per-process priority and affinity via Task Manager are a scalpel instead of a sledgehammer. Use those first.
Related Guides
Pair this guide with the rest of the Win32 Disk Imager knowledge base. These cover the adjacent workflows you’ll hit when working with disk images, bootable USBs, and Windows partition management.
- Disable Thumbnail Preview in Windows 11 File Explorer — Turn off File Explorer thumbnail generation for faster folder loads and less thumbcache corruption.
- Hide a Partition in Windows 11 with Diskpart — Remove a drive letter via diskpart to keep a partition out of File Explorer. Casual hiding, not encryption.
- How to Use Win32 Disk Imager — Complete Beginner Guide — The full reference for the Win32 Disk Imager tool itself — install, UI walkthrough, and common workflows.